Chic Yet Fun Valentines Table Scape + DIY Placemats
My son and I wanted to have a little after school Valentine’s get together for his best buds from school so here’s what I did to create a Valentine’s table scape that was a chic (for me:) yet fun and festive table for them. And never mind the absence of blue here (except for the cake stand and dinner plates)…they are all tough little guys and trust me, a little bit of pink wouldn’t dare shake these boys:)!
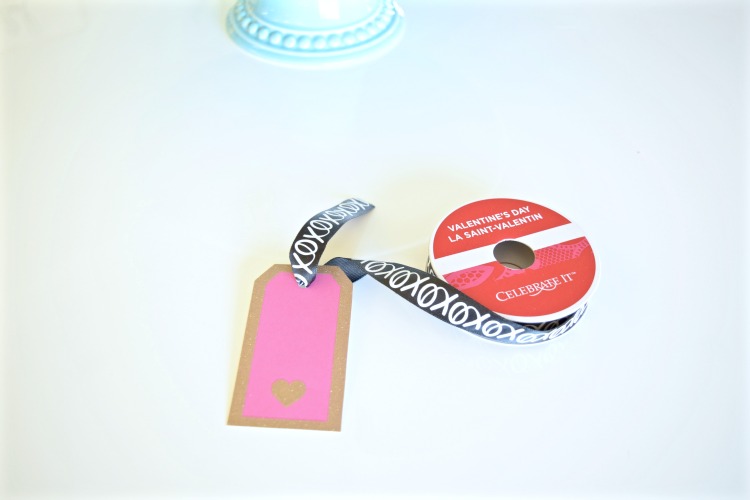
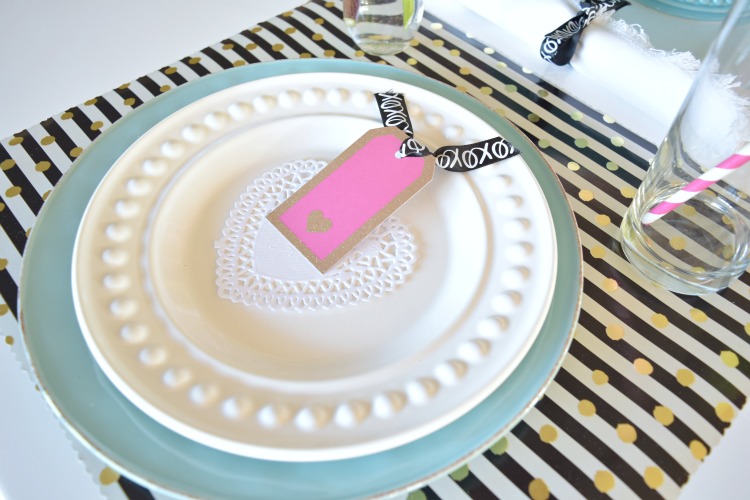
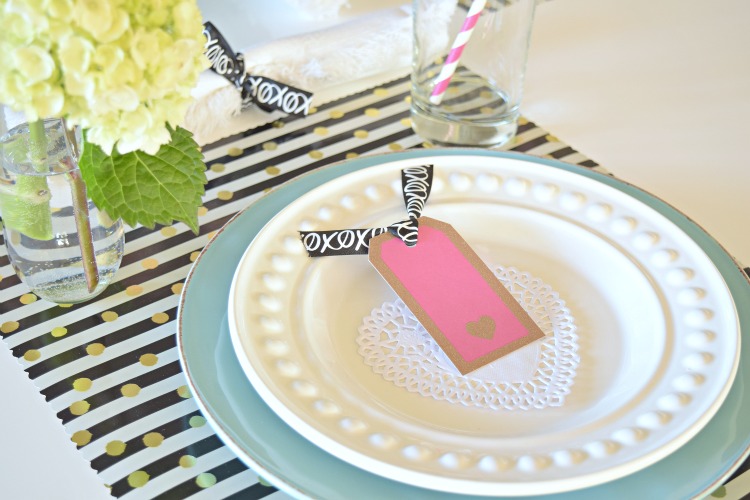
My jumping off point (or inspiration piece) for this table was this adorable XO black and white ribbon…I mean how darn cute is this?! And then when I saw these pink and gold Valentine’s place cards, I just knew it was a match made in Valentine’s heaven (both items from Michael’s)!! I don’t decorate with pink normally in my home of boys but, if I had had a little girl, she most definitely would have had a pink and black and white bedroom…I just think it’s such a fun, classic, chic combination and then when you throw some gold into the mix, it’s just perfect!
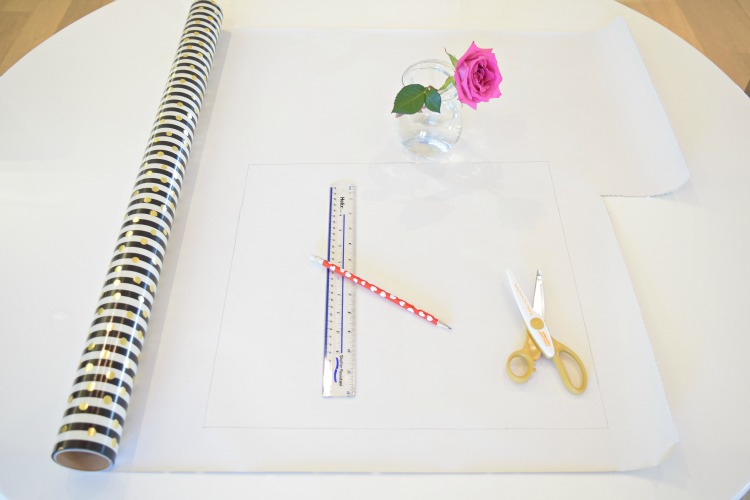
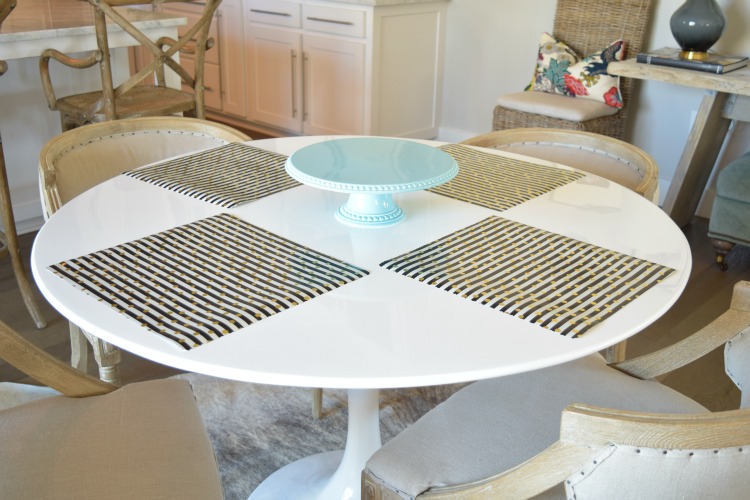
For placemats I had in mind that I wanted some simple gold scalloped paper placemats but didn’t want to spend $11 on 50ct of them (that I didn’t need) so when I spotted this black, white & gold wrapping paper at HomeGoods for only $2.99, I knew in an instant what I would do with it!! Enter simple DIY Valentine’s placemats!
1st I had to figure out what size I needed my placemats to be so I placed all of the dishes that I thought might go onto the placemat on the wrapping paper, and then measured to get my measurements for the placemat. I also didn’t want the corners of the placemats to overlap on my round table so I ended up making them in 2 different sizes. If you decide to do this you can make them whatever size is appropriate for your table but for this instance my table is 48” round and I ended up doing two of mine 13”x14” and 2 of them 14”x15”. Just looking at the table, the difference in size wasn’t noticeable at all but it was noticeable that the placemats were the fit nice and neat on the table.
Next I just simply sketched out my measurements on the back of the wrapping paper and went to town with my scalloped scissors (found here). Of course I could have just cut the edges straight but I had to cut them anyway so I figured why not make the edges pretty vs. a boring straight edge. And of course it never hurts to have a pink rose close by when you are working:).
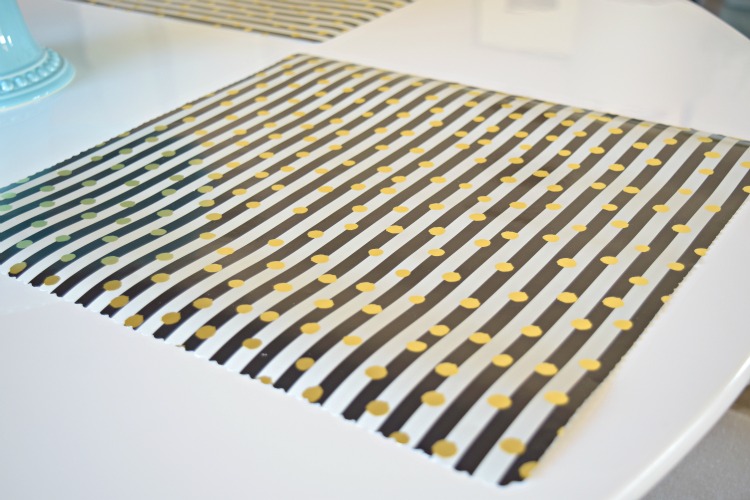
And here is my finished product which only took about 2 minutes per placemat, and again, only cost me $2.99 and was super fun to create!!
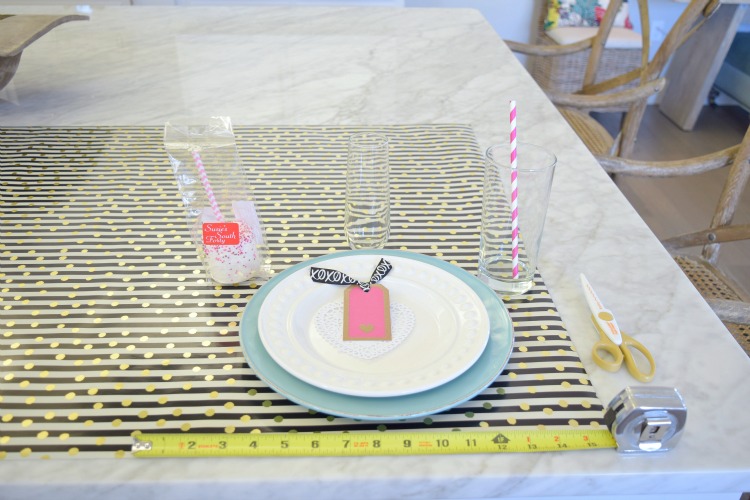
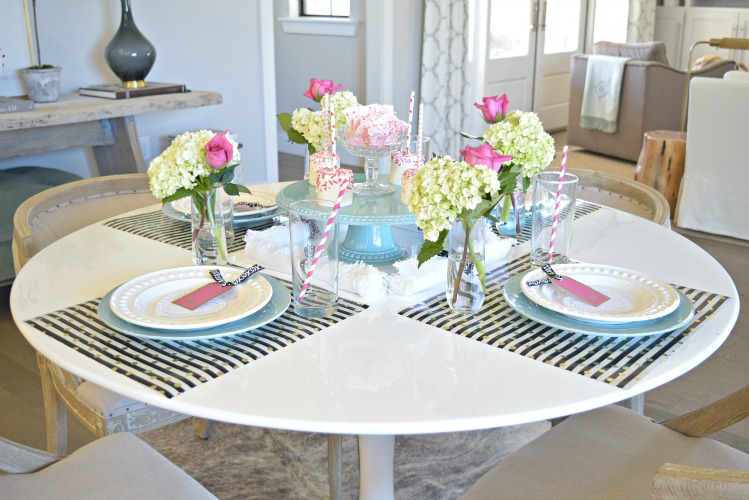
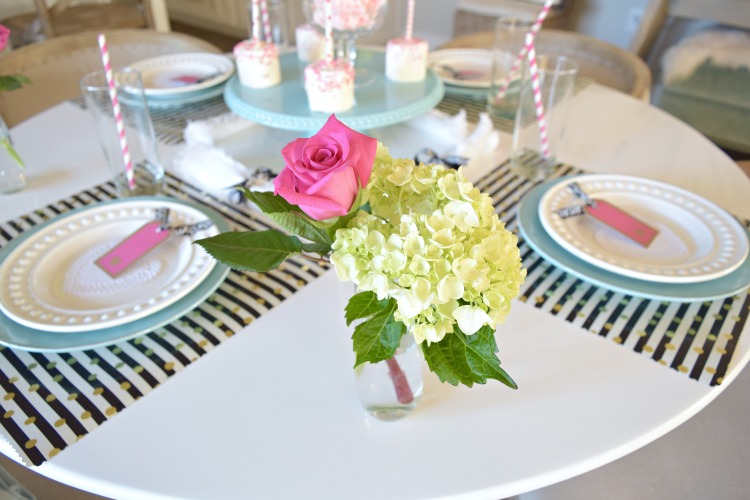
Next I added all of the placemats to my table along with this fun beaded aquamarine cake stand from HomeGoods (my happy place!).
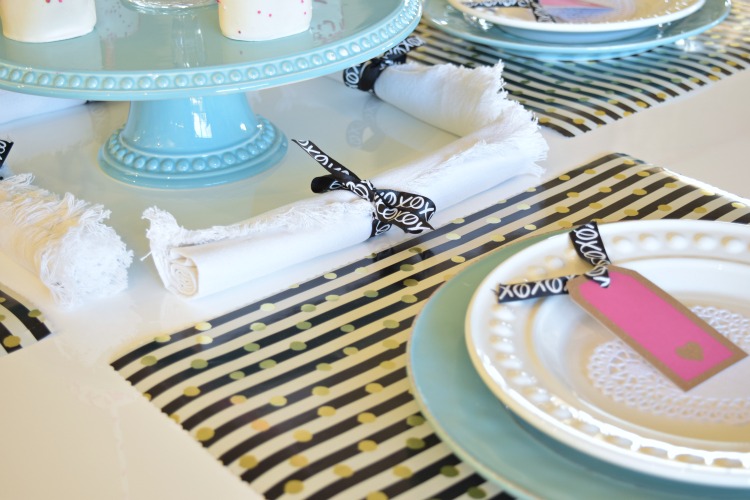
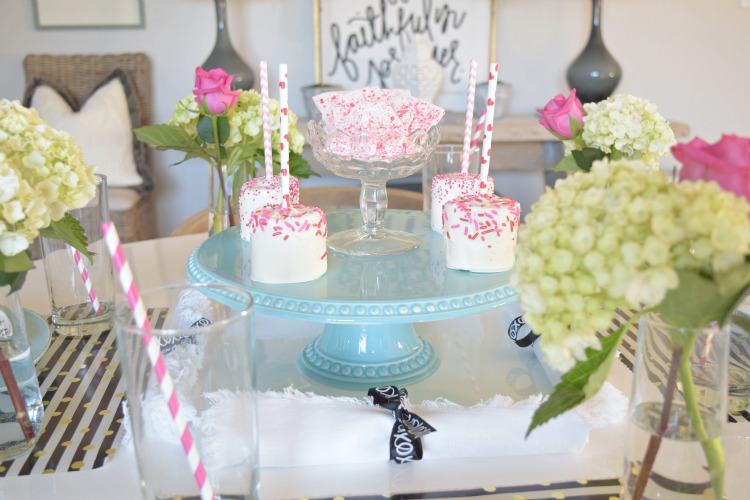
And then the rest of the layering (and fun!) begins. I then added my dishes, doilies, place cards I fashioned with the XO ribbon, and this beautiful crystal candy dish my mother gave to me that was passed down from her mother-in-law. This piece ends up being the center piece for the yummiest treat on the table. And I really love how the beading on the cake stand ties in with the beading on the dinner plates (for later that evening) and also ties in with the dots on my DIY wrapping paper placemats . Tip: I think it’s always important to repeat at least one pattern in any design project when you can as I believe repetition (at least subtle repetition) in a space brings more continuity and flow to the space and/or project!
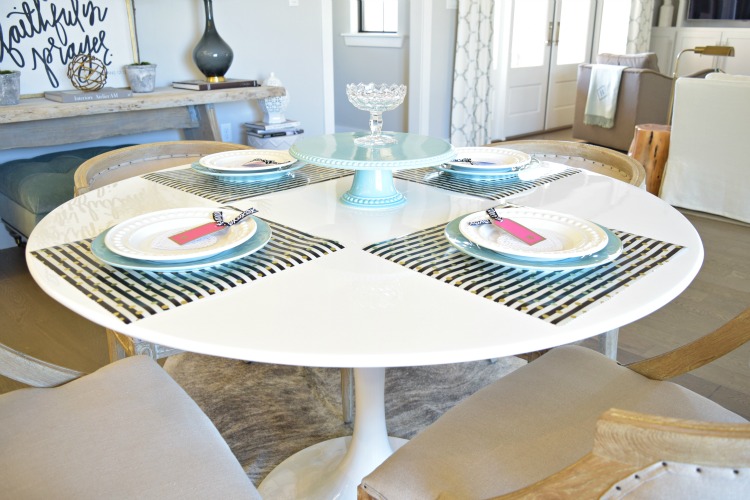
I also added some simple white, fringed napkins that I already had and used the same XO ribbon for napkin rings. The treats were added at this point as well because I couldn’t wait to see what they would look like on the table any longer! I found these adorable Valentine’s marshmallow treats at my local market (and boy were they yummy) along with this Valentine’s white chocolate bark (that was even yummier) and the kiddos absolutely loved both. I thought it would be fun to do something a little different here since they will be having the traditional Valentine treat of cupcakes and cookies at their school party this week!! I always like to be a little different when I can and the kiddos really enjoyed it!
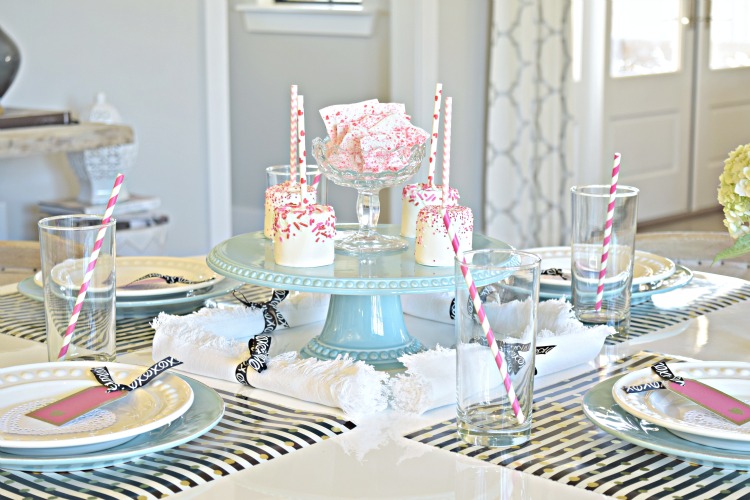
And then I added the icing on the cake for me which were these beautiful pink roses and baby hydrangeas in a small glass from Pier 1 (that worked perfectly as a vase here)….

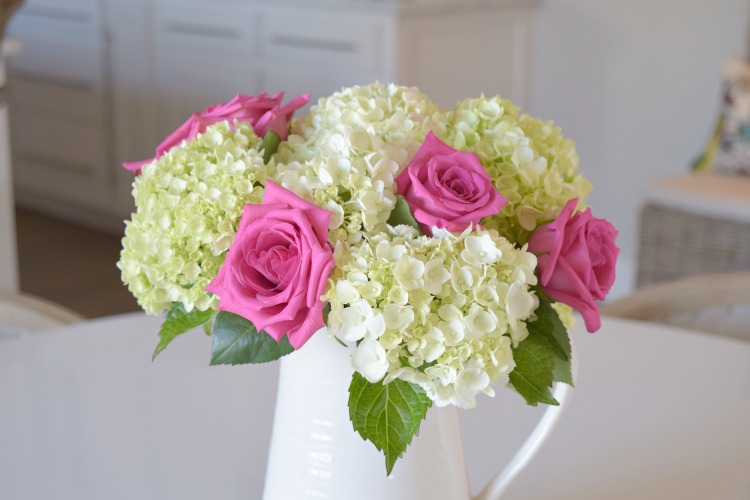
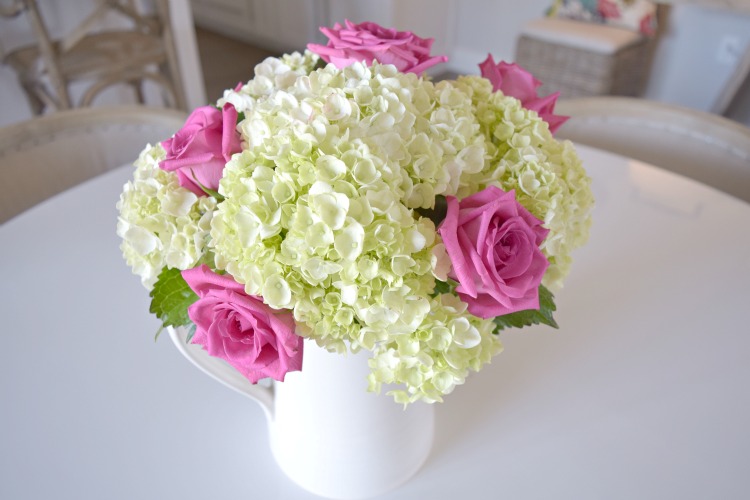
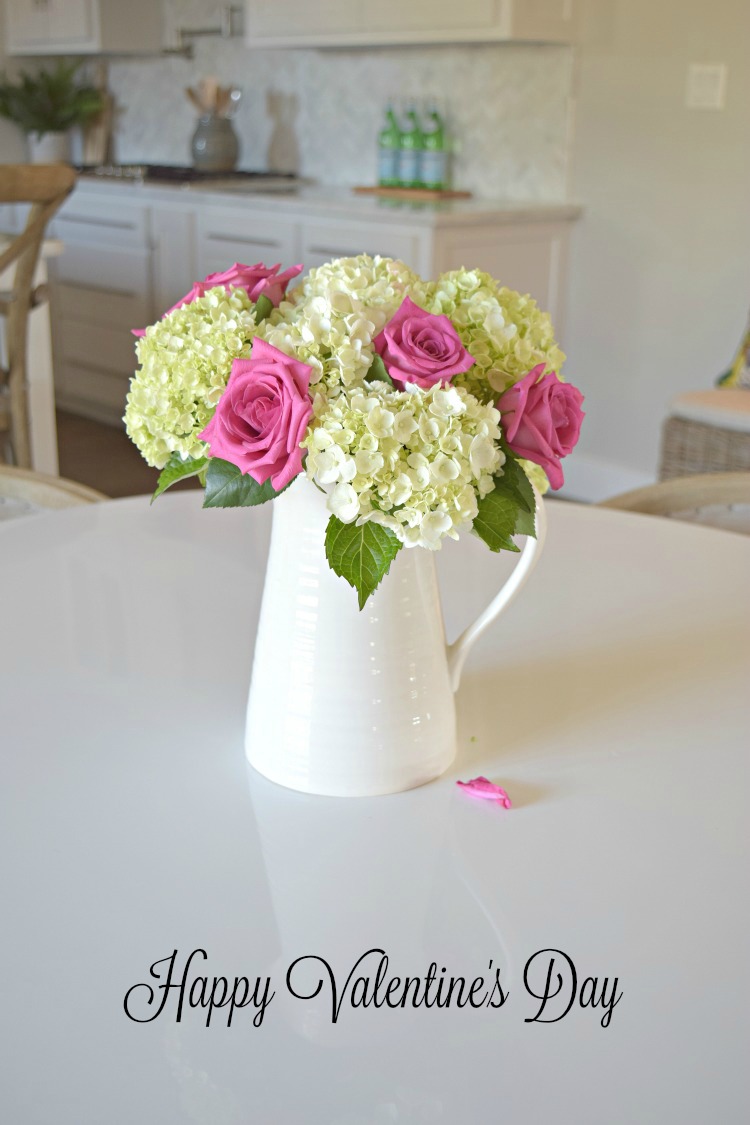
It was a fun afternoon for my son and his pals and I think this table setting made them feel just a little more grown up (it was actually shocking how well behaved they were while at the table, especially while consuming so much sugar, lol). They even liked the flowers which are still with us. And, this is what I did with them after the party and we are still enjoying them as a centerpiece that lights up this space every time we pass through it for now …
Hope you get to enjoy this up coming Valentine’s Day with the one or ones you love and always remember…”Let all that you do be done in love” 1 Cor 16:14

So fun and cute!!! Can’t wait to hear how your son and his buddies enjoy their get together!
Thanks, Jen!! It as fun and thank you for stopping in:)
Love the cute wrapping paper placemats!! You styled it all up so perfectly Bree for your little guy!
Xoxo
Thank you for stopping in Shauna!! I got some great ideas from the best…hugs:)
Thank you for any other excellent article. Where else may just anybody
get that kind of information in such a perfect way of writing?
I’ve a presentation subsequent week, and I am on the look for such info.
Thank you and thanks for stopping by!