The Cottage Kitchen Renovation Details and Reveal
Thank you for stopping by to see The Cottage Kitchen Renovation Details and Reveal! I know, it’s been a minute since I’ve been on the blog BUT, we’ve been super busy! Real quick but here’s what we’ve been up to…
*This post contains affiliate links. Please see my full privacy & photo policy here.
In May of last year we moved from TX to AL (you can read the full story here) and we were going to build but then found this amazing little cottage in a great neighborhood that we fell in love with! Before we found The Cottage we bought two starter homes, made some simple to moderate updates to them and turned them into investment properties (they are both currently rented out). In the mean time we found The Cottage in the fall of ’22. It was only 3 yrs old but there were a few things we wanted to do to make it our own before we moved in. We started out with the intent to just redo the floors and replace the vanity in the primary bath because it only had one sink but ultimately ended up deciding to do a lot more while we had the house torn apart – it just made sense. I’ll discuss what updates we’ve made to each room with each room reveal to come!
Speaking of updates – The Cottage Kitchen is either my favorite or my 2nd favorite room in the house – I can’t decide! But first, here is what it looked like before. Don’t get me wrong, it was super cute and would have been fine if this was our vacation home but for a more permanent situation we wanted something that felt a little more elevated. Here is what it looked like before…I took this photo while on a real estate tour of the house…
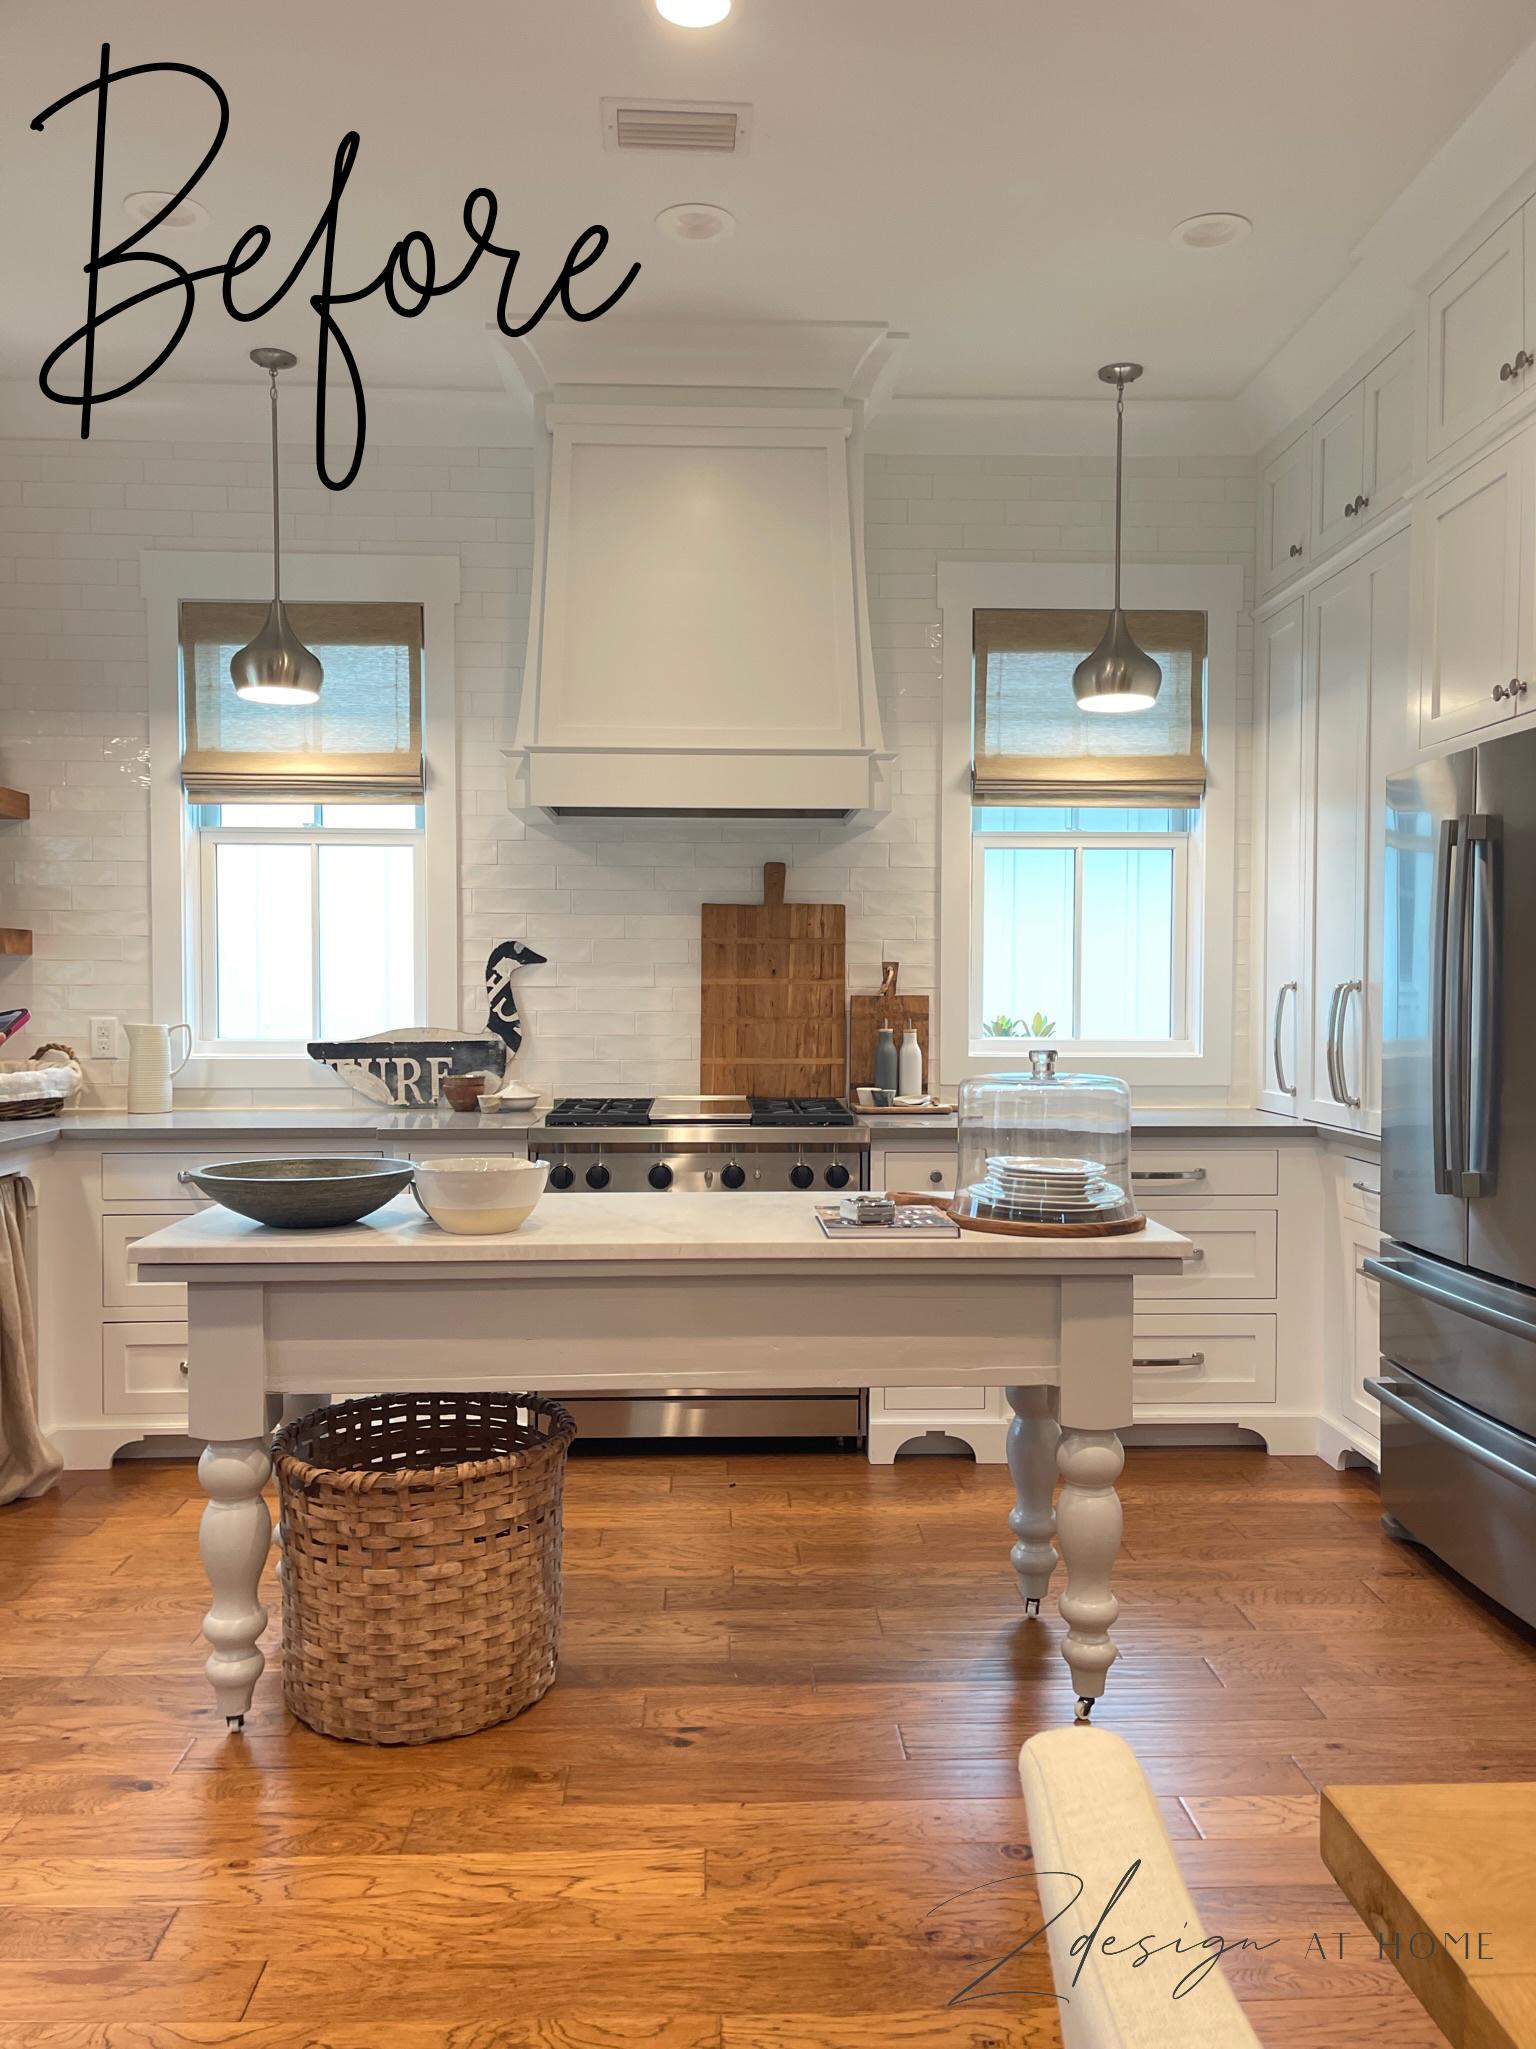
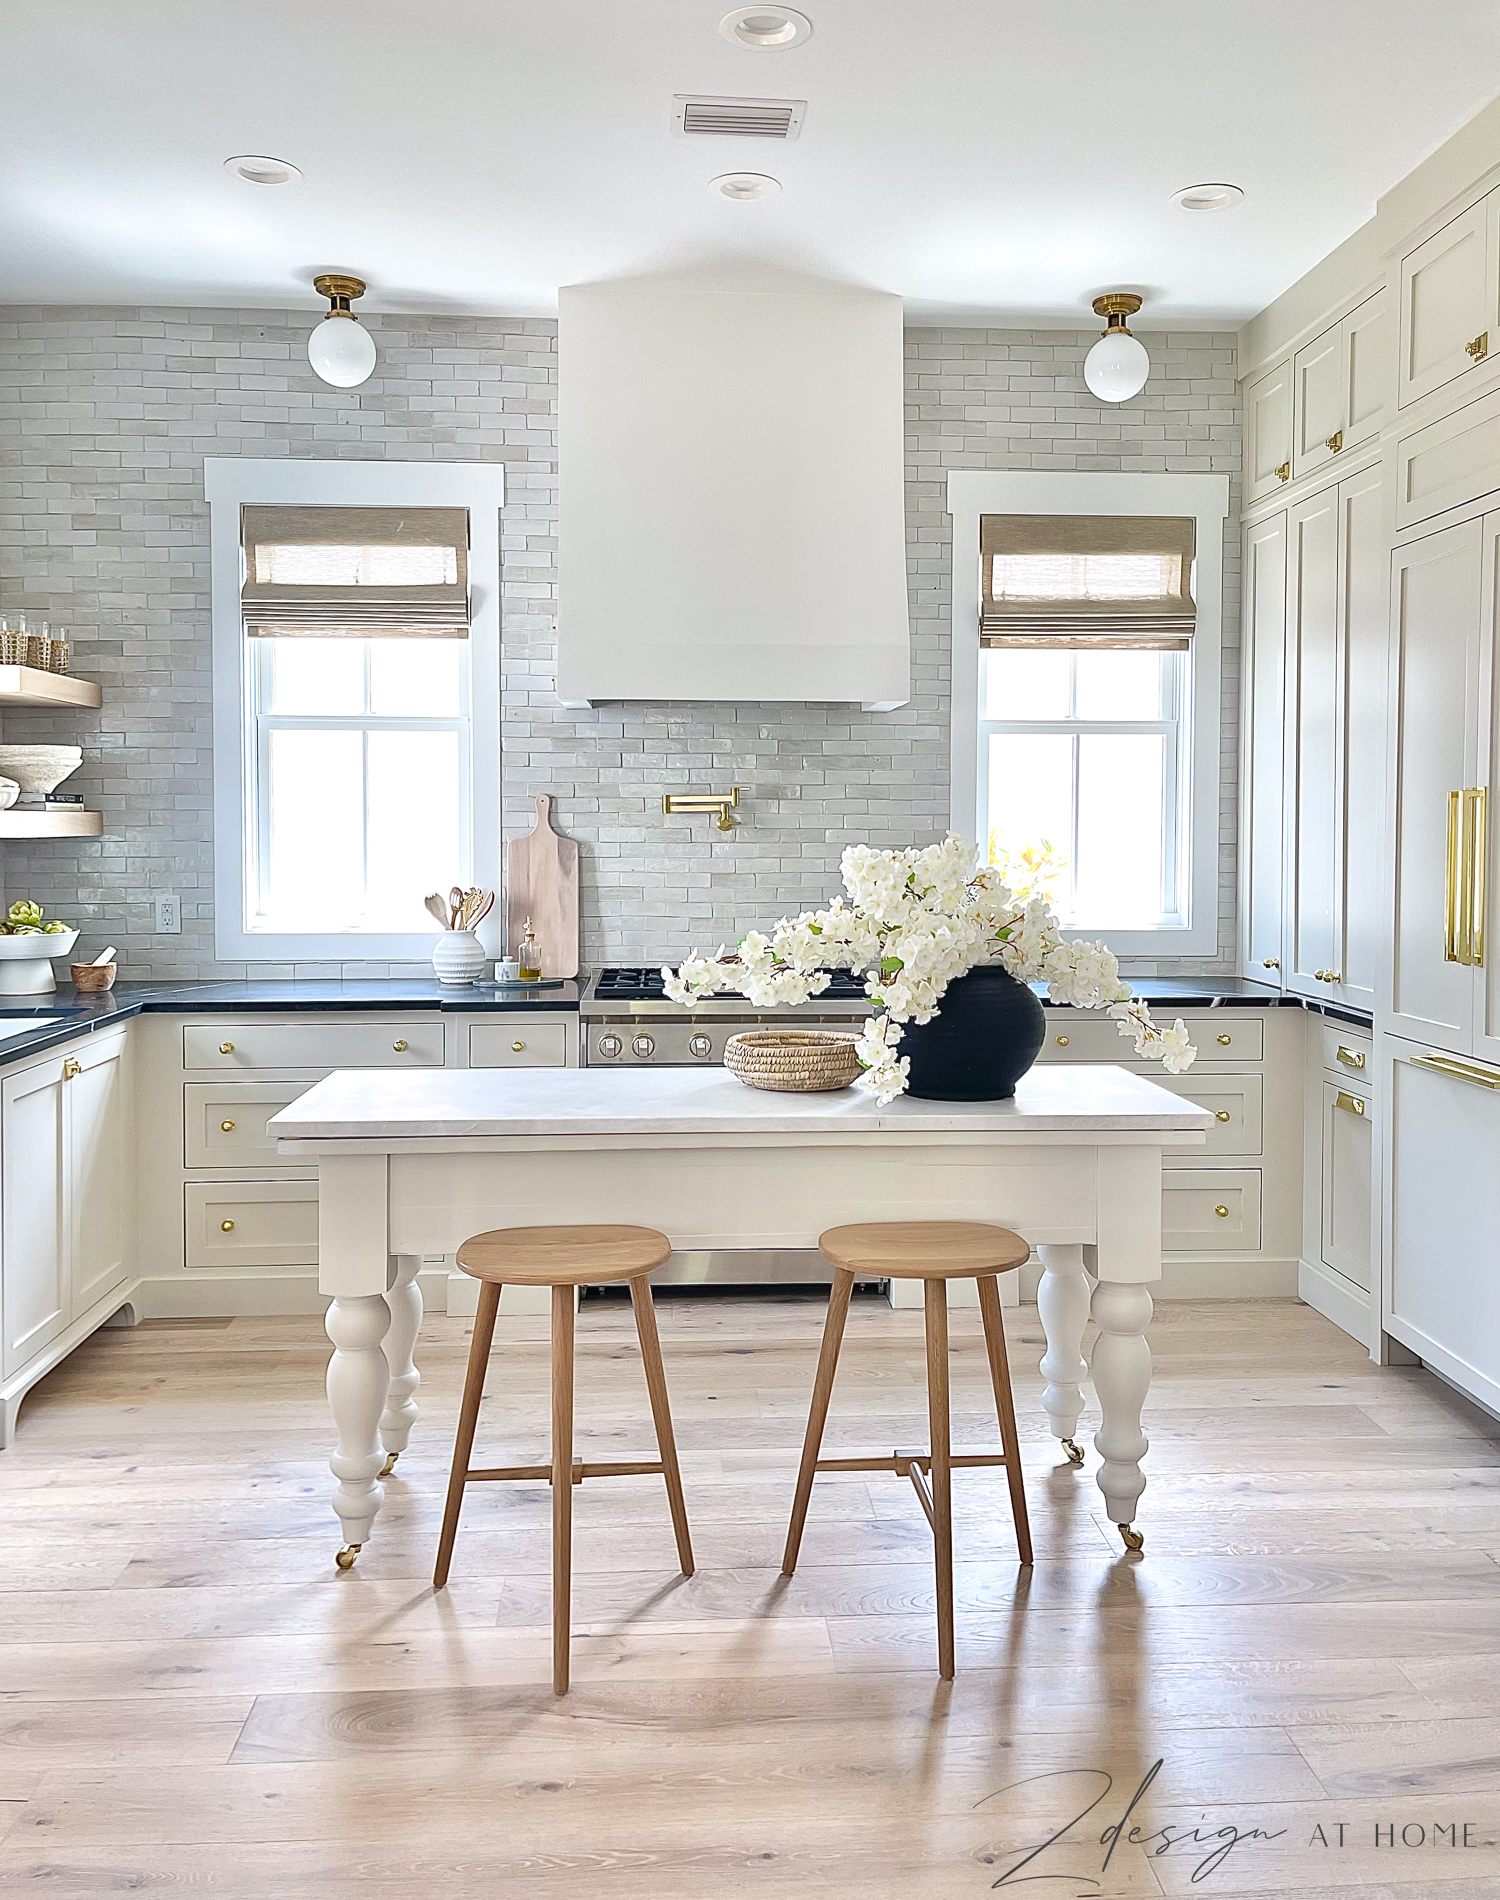
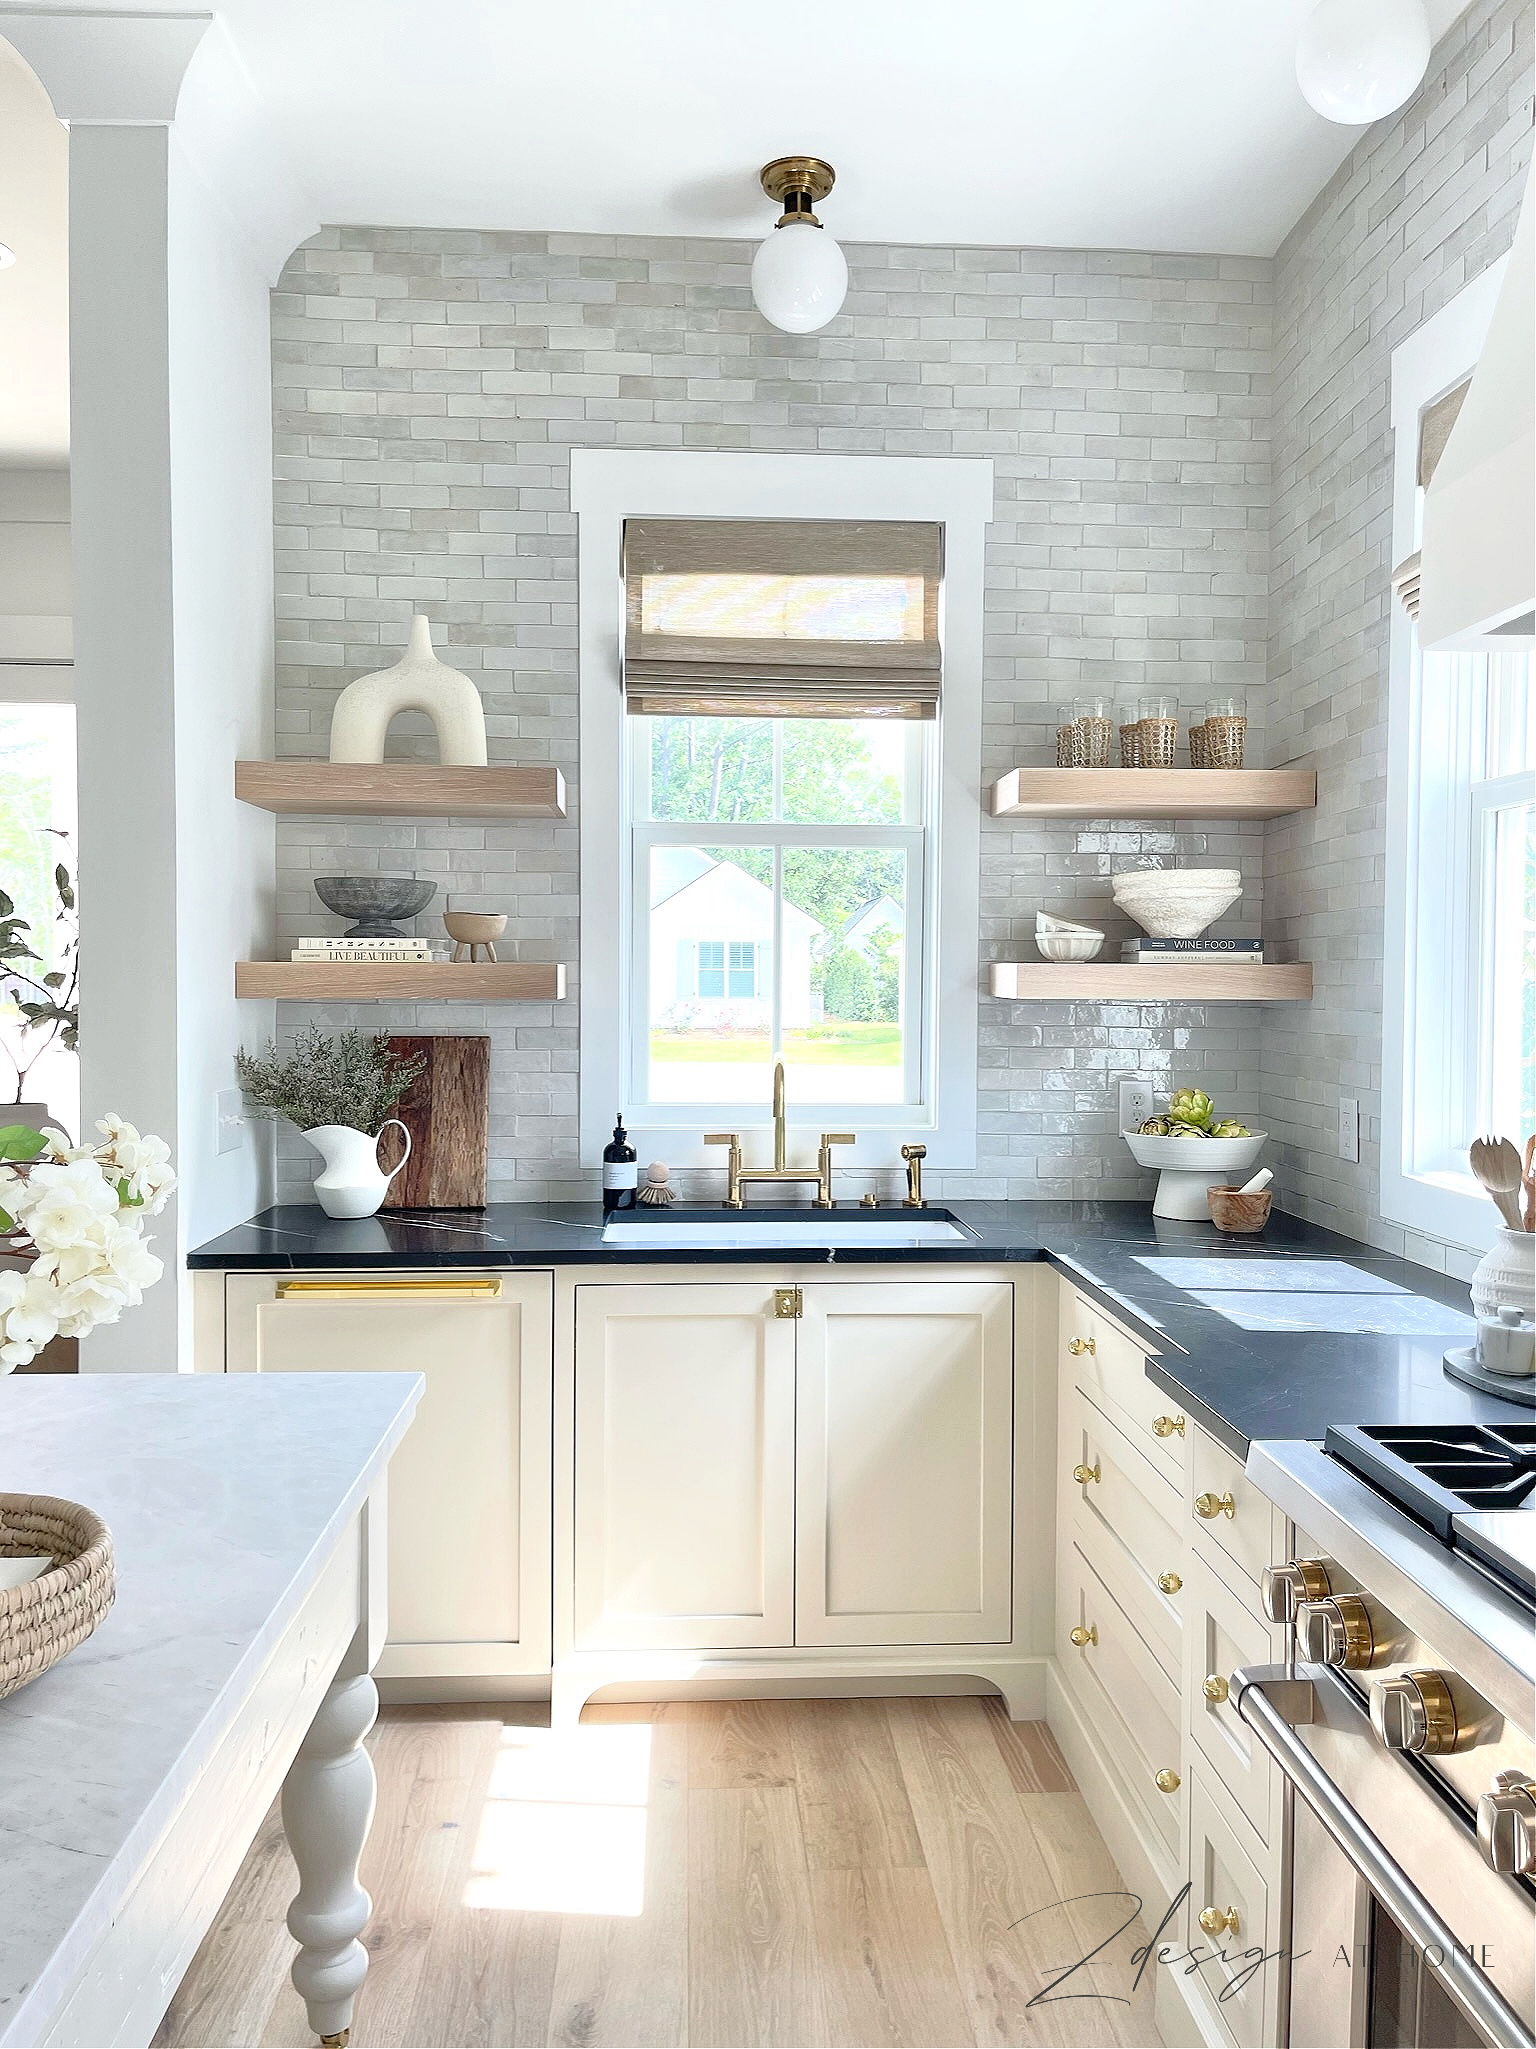
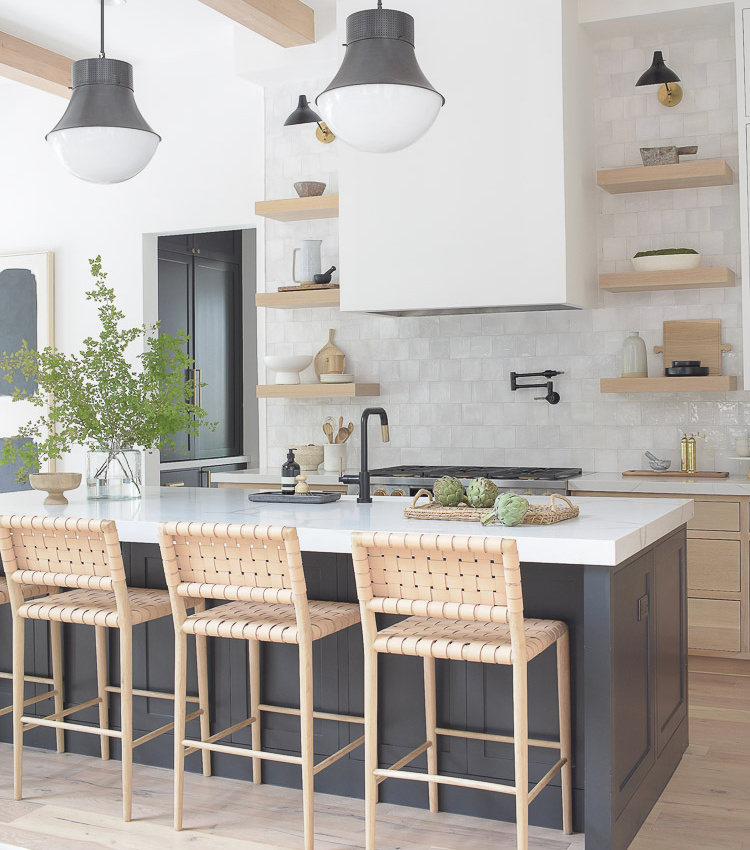
And here is what it looks like now…
So here’s the Run Down…
Again it was just supposed to be the floors we were swapping out but the more I thought about it and studied the kitchen the more I began to realize there was just so much about it I didn’t love for my personal taste. The only things I did like were the layout, the island, and the windows so at some point throughout the floor and bath renovation (replacement cabinets for the two spaces took several months) we decided to go ahead and make some real changes to the kitchen.
The Countertops
The first thing to go was the perimeter countertops. I had the former countertops in my laundry room inTX and just wasn’t super fond of the gray quartz. On the other hand I did love the white marble on the island however, I knew I couldn’t match it perfectly for the perimeter so I decided to go with a honed black marble on the perimeter. I believe the color is called Nero and I absolutely LOVE it! I discovered while living in our TX home that I didn’t love quartz and when I knew we’d be replacing countertops in this house I replaced everything with marble. There is truly nothing like the warmth of natural stone and even with the etching and stains marble receives, I’ll take it any day of the week over quartz (of course this is only my personal opinion and I’ll explain why in another post later but feel free to comment below or email me with questions in the meantime:).
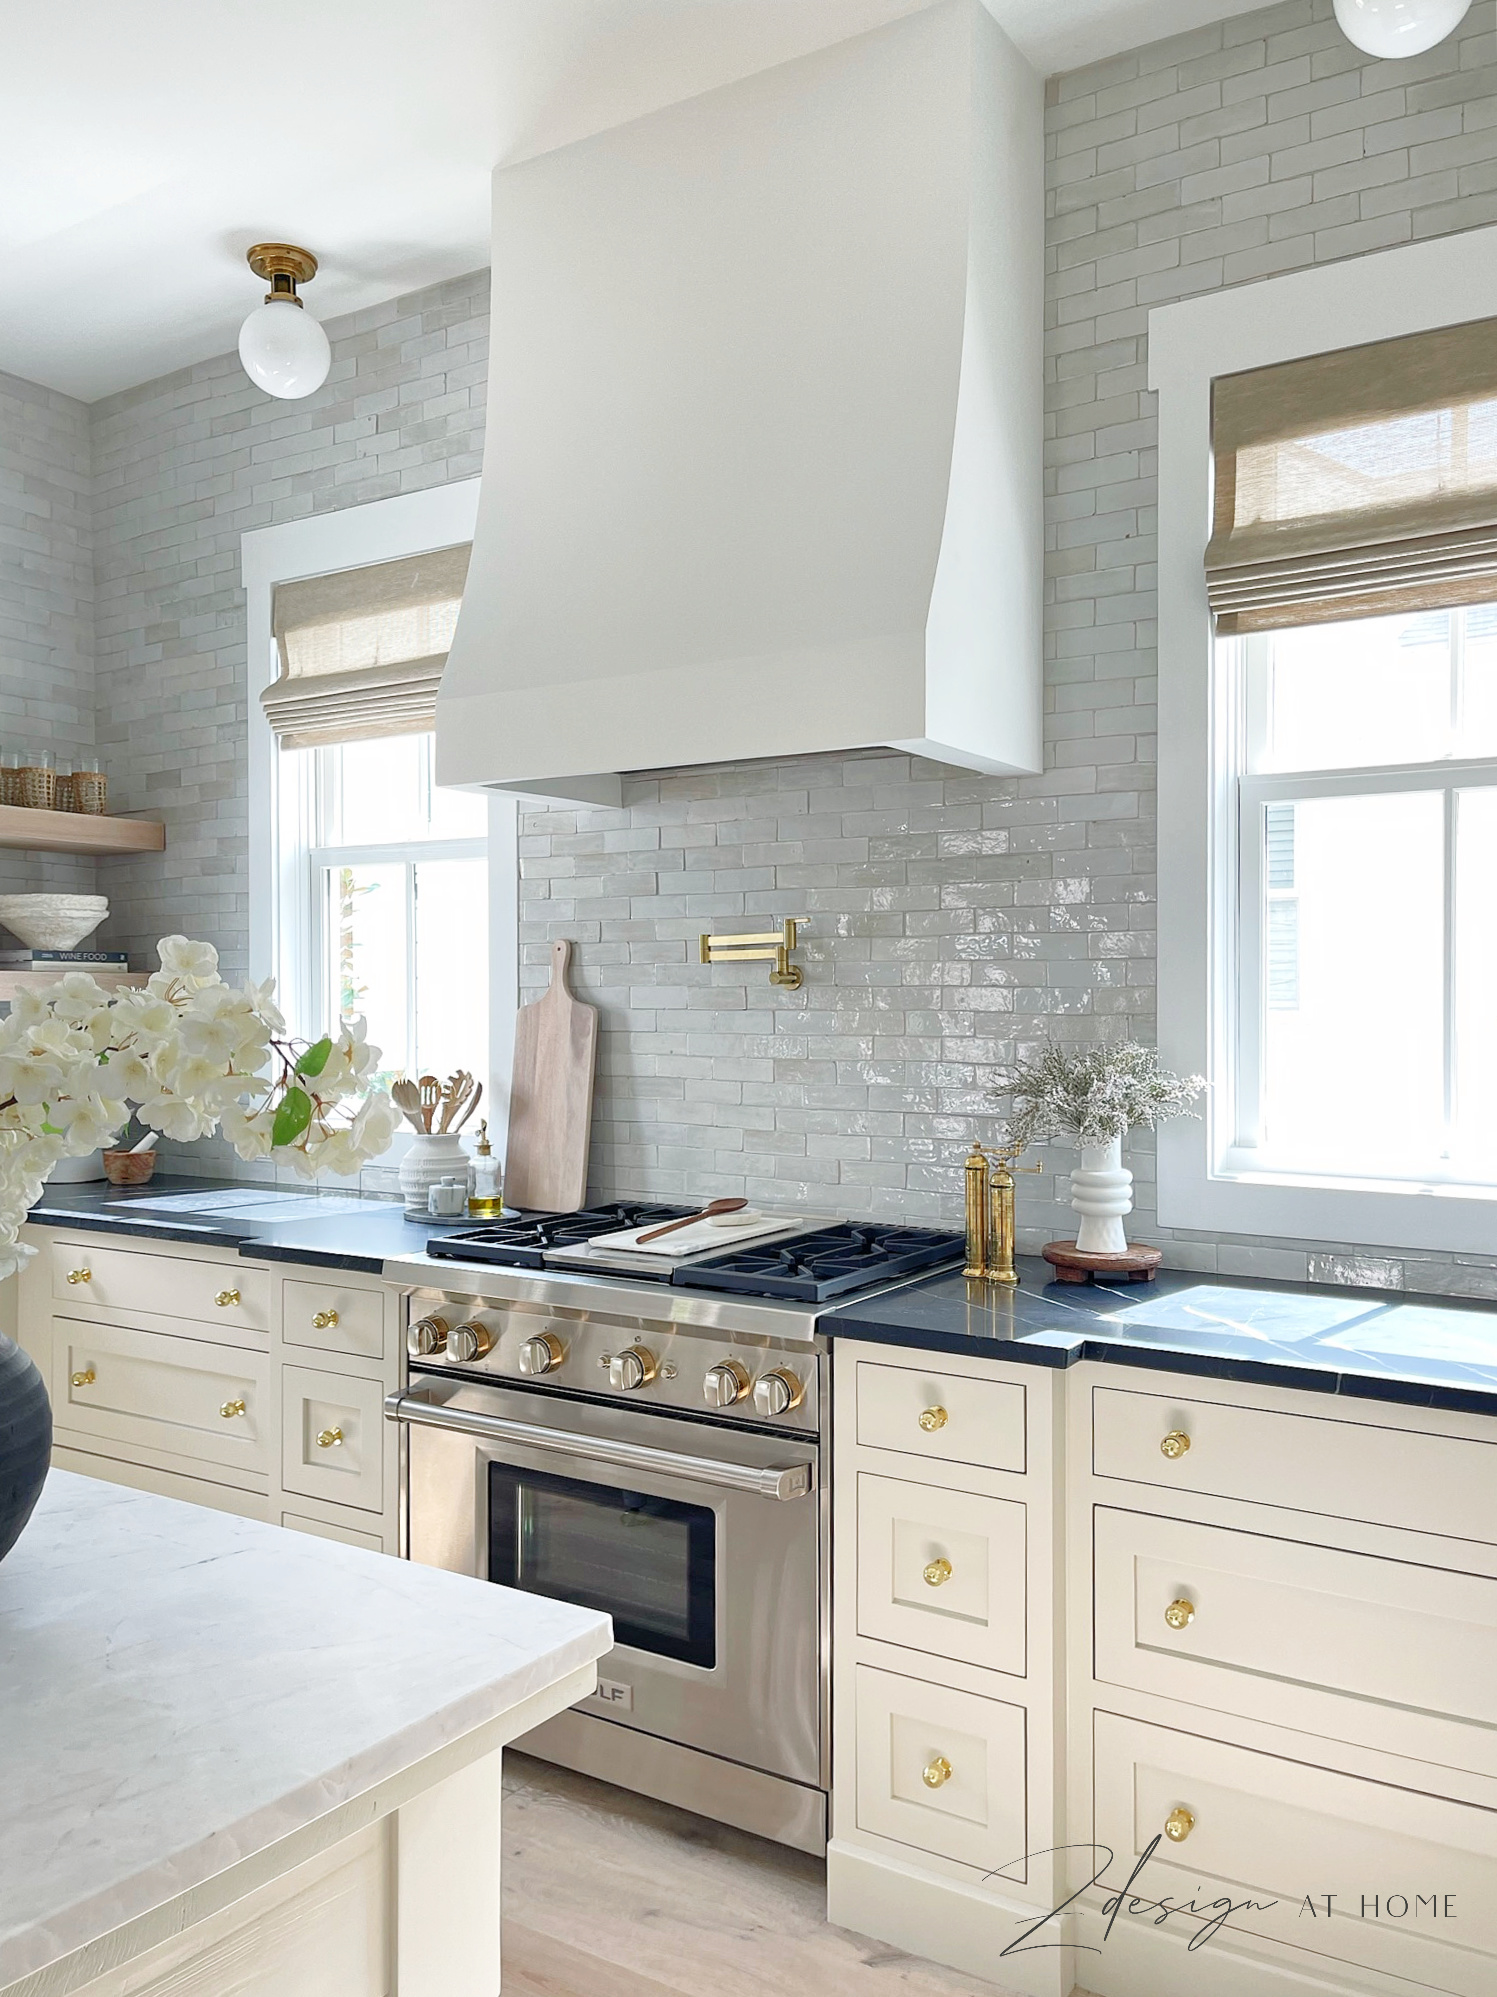


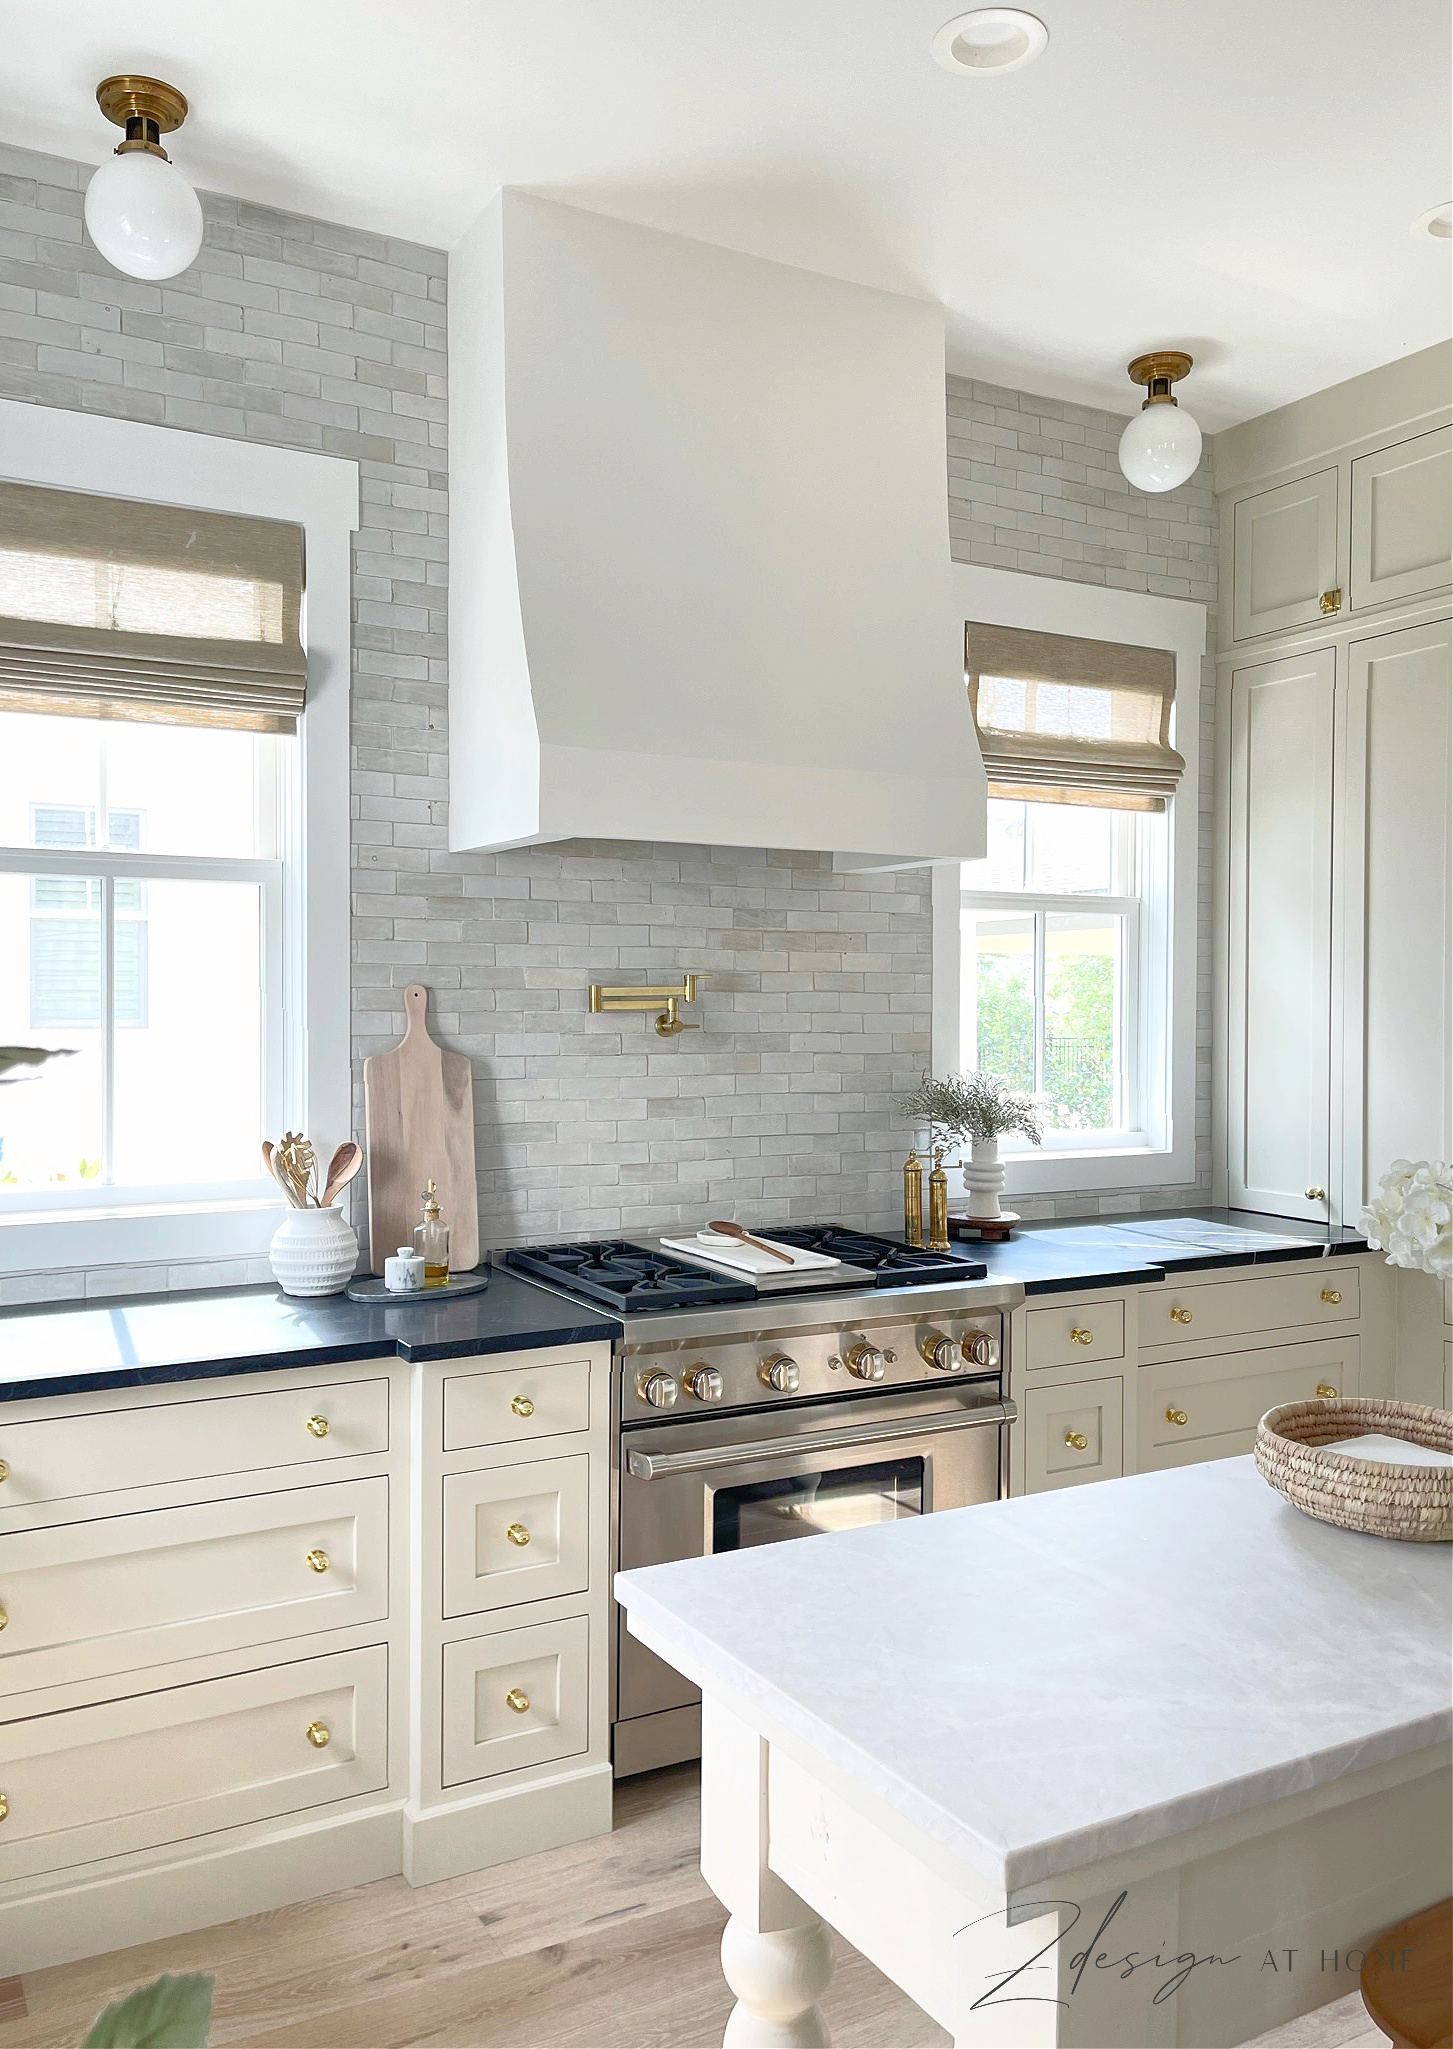
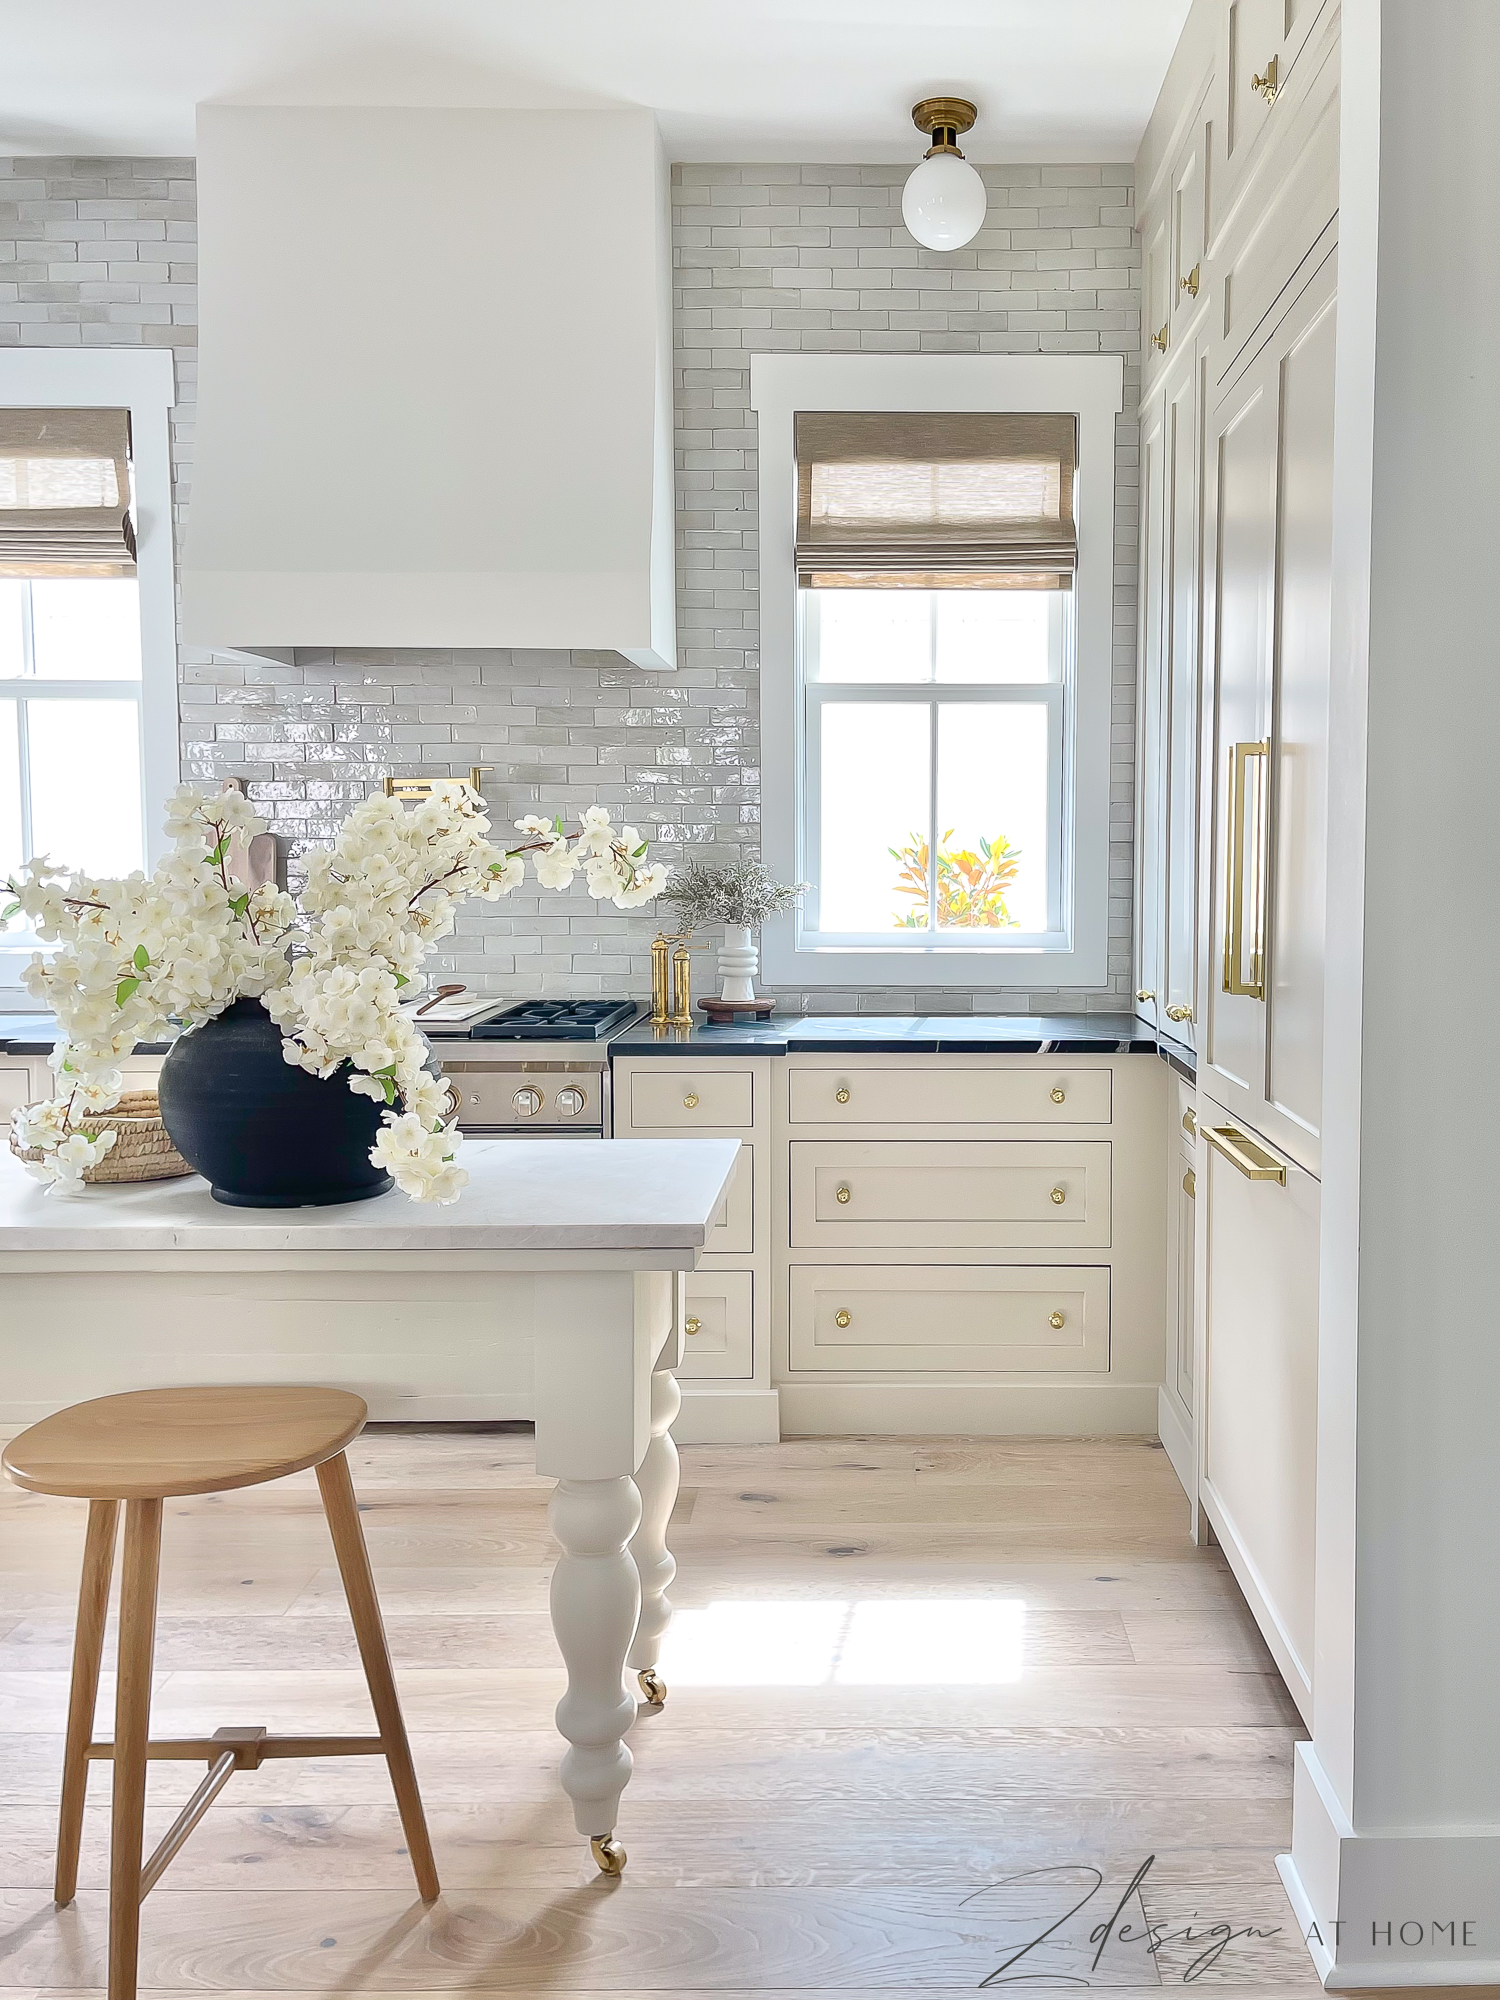
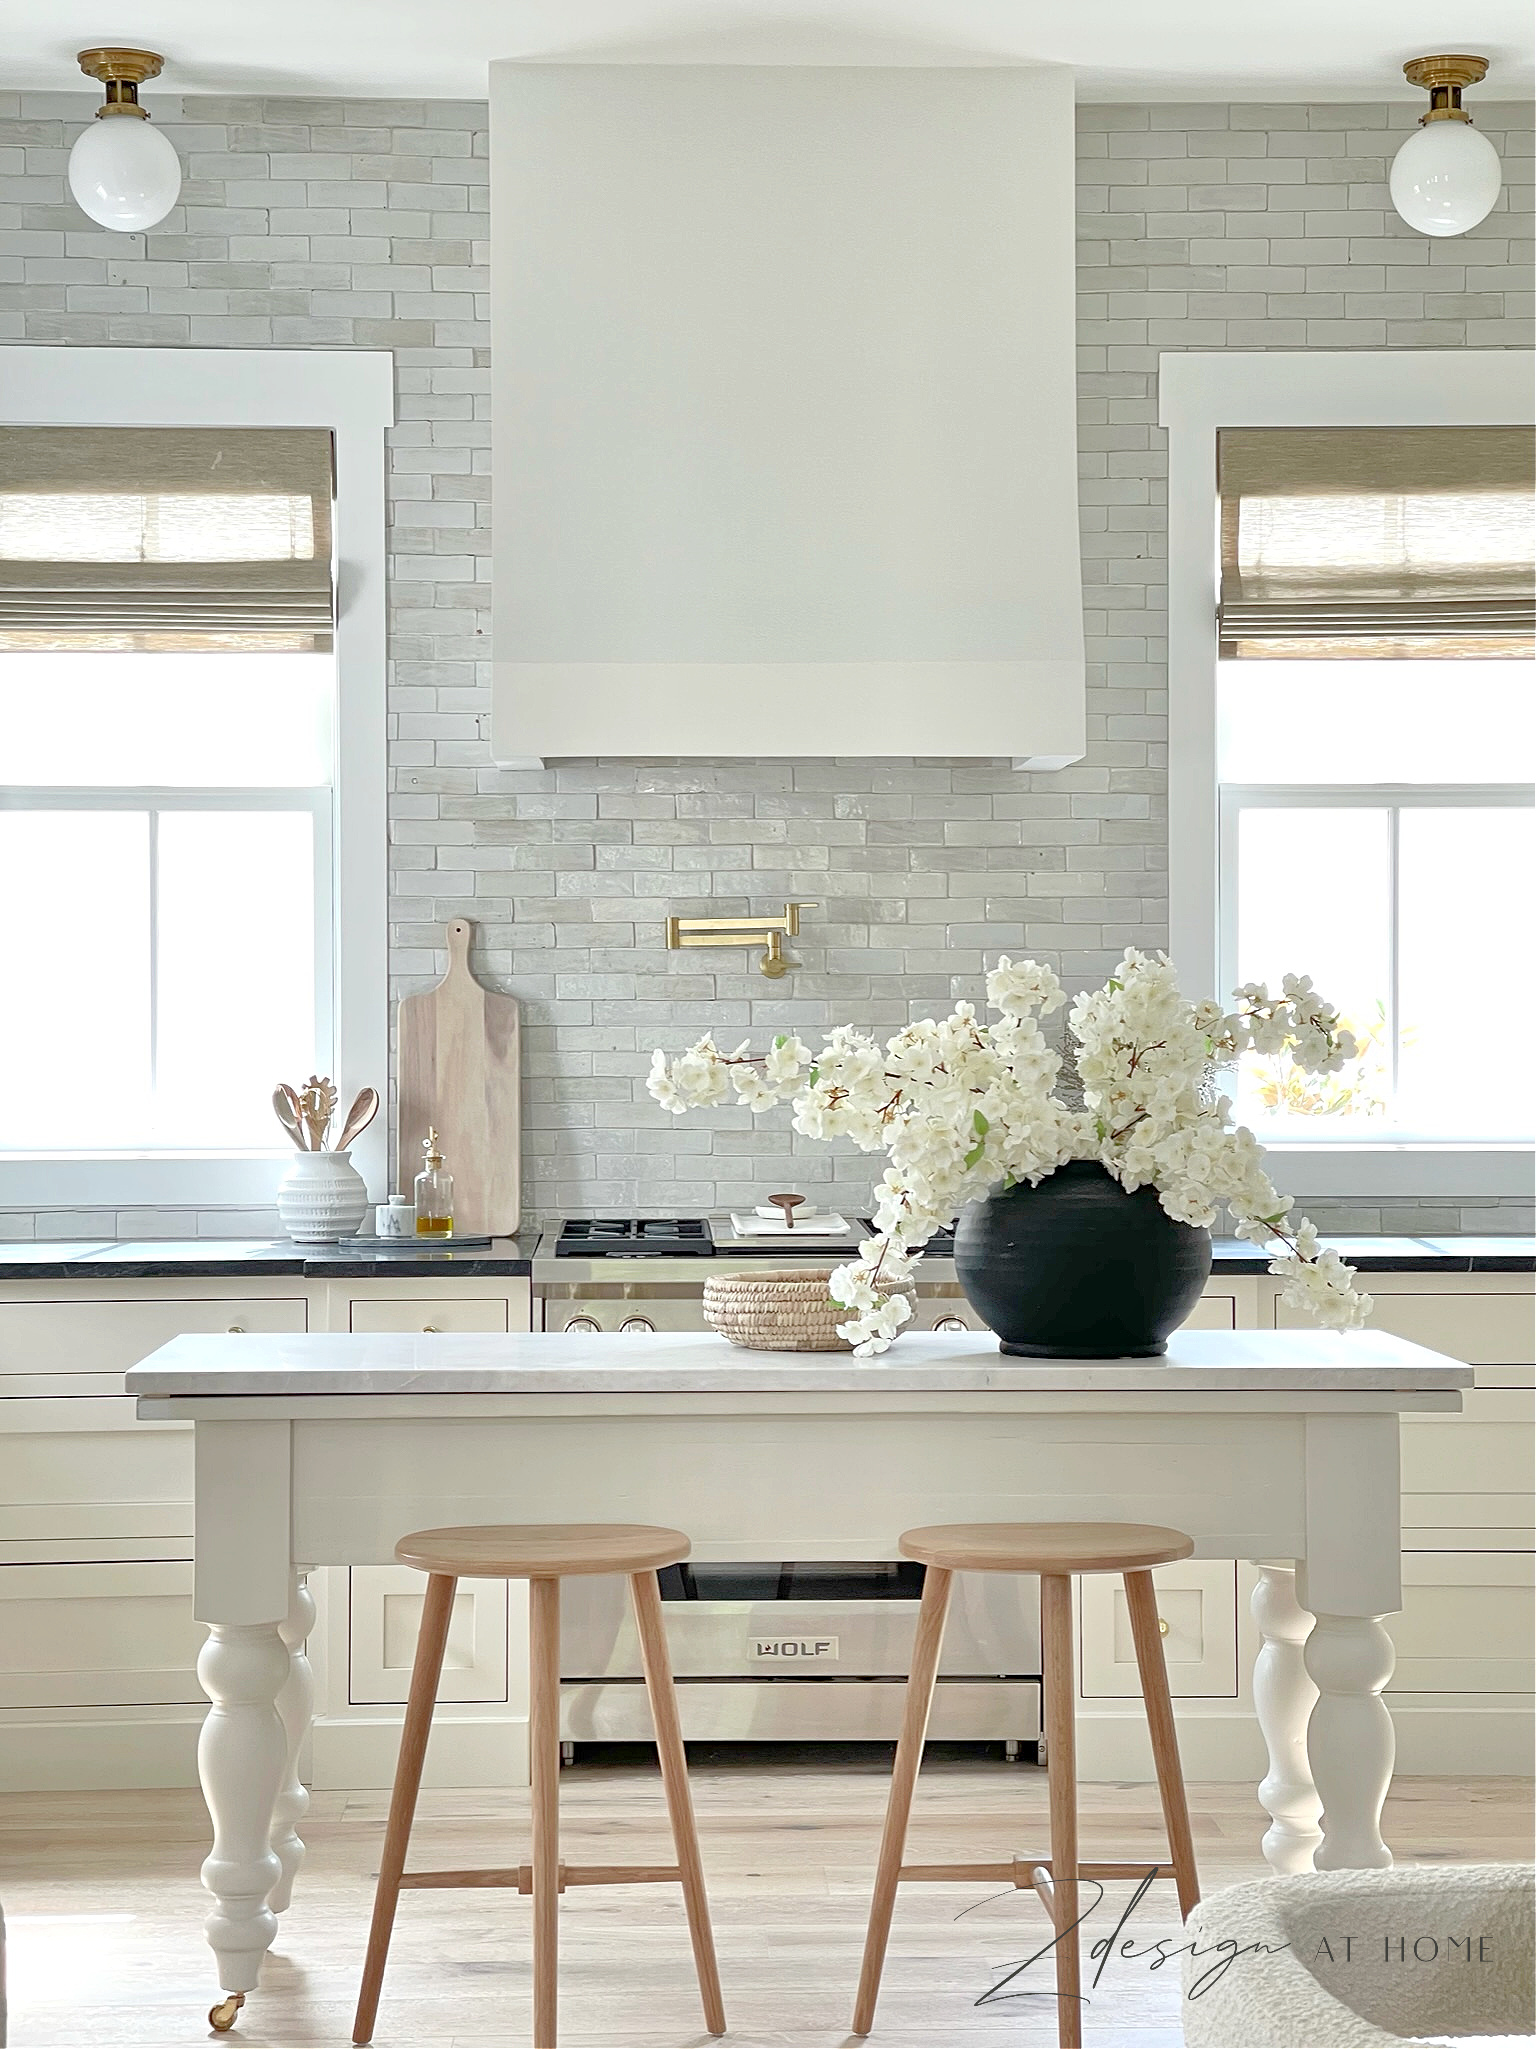
The Range, Range Hood & Pot Filler
The Wolf range did come with the house and so far I love it, of course. But, I did replace the knob bezels with brass bezels (it’s all in the details, right?). I also replaced the black knobs with stainless knobs since you can’t get brass knobs for this range that I could find. I purchased the knobs & bezels through my local Ferguson store. We also replaced the range hood. I gave my awesome cabinet guy, Joey a few inspo pics from Pinterest and with some tweaks he built the frame for it, and did a fabulous job (you can find him at Fountain Construction & Cabinetry if you’re local). And then we just had it sheet rocked and painted the same white as the rest of the house (SW Extra White).
We also decided to add this pot filler while the backsplash was torn out because at this point my plumber was able to run the water line from the sink to the stove since there was no backsplash or sheetrock on the walls, only the studs. This was a last minute decision that I’m so incredibly happy we did and we also removed two electrical outlets on either side of the stove – props to the hubby on that! He saved us so much money on this renovation with electrical since he was able to do all of it himself.
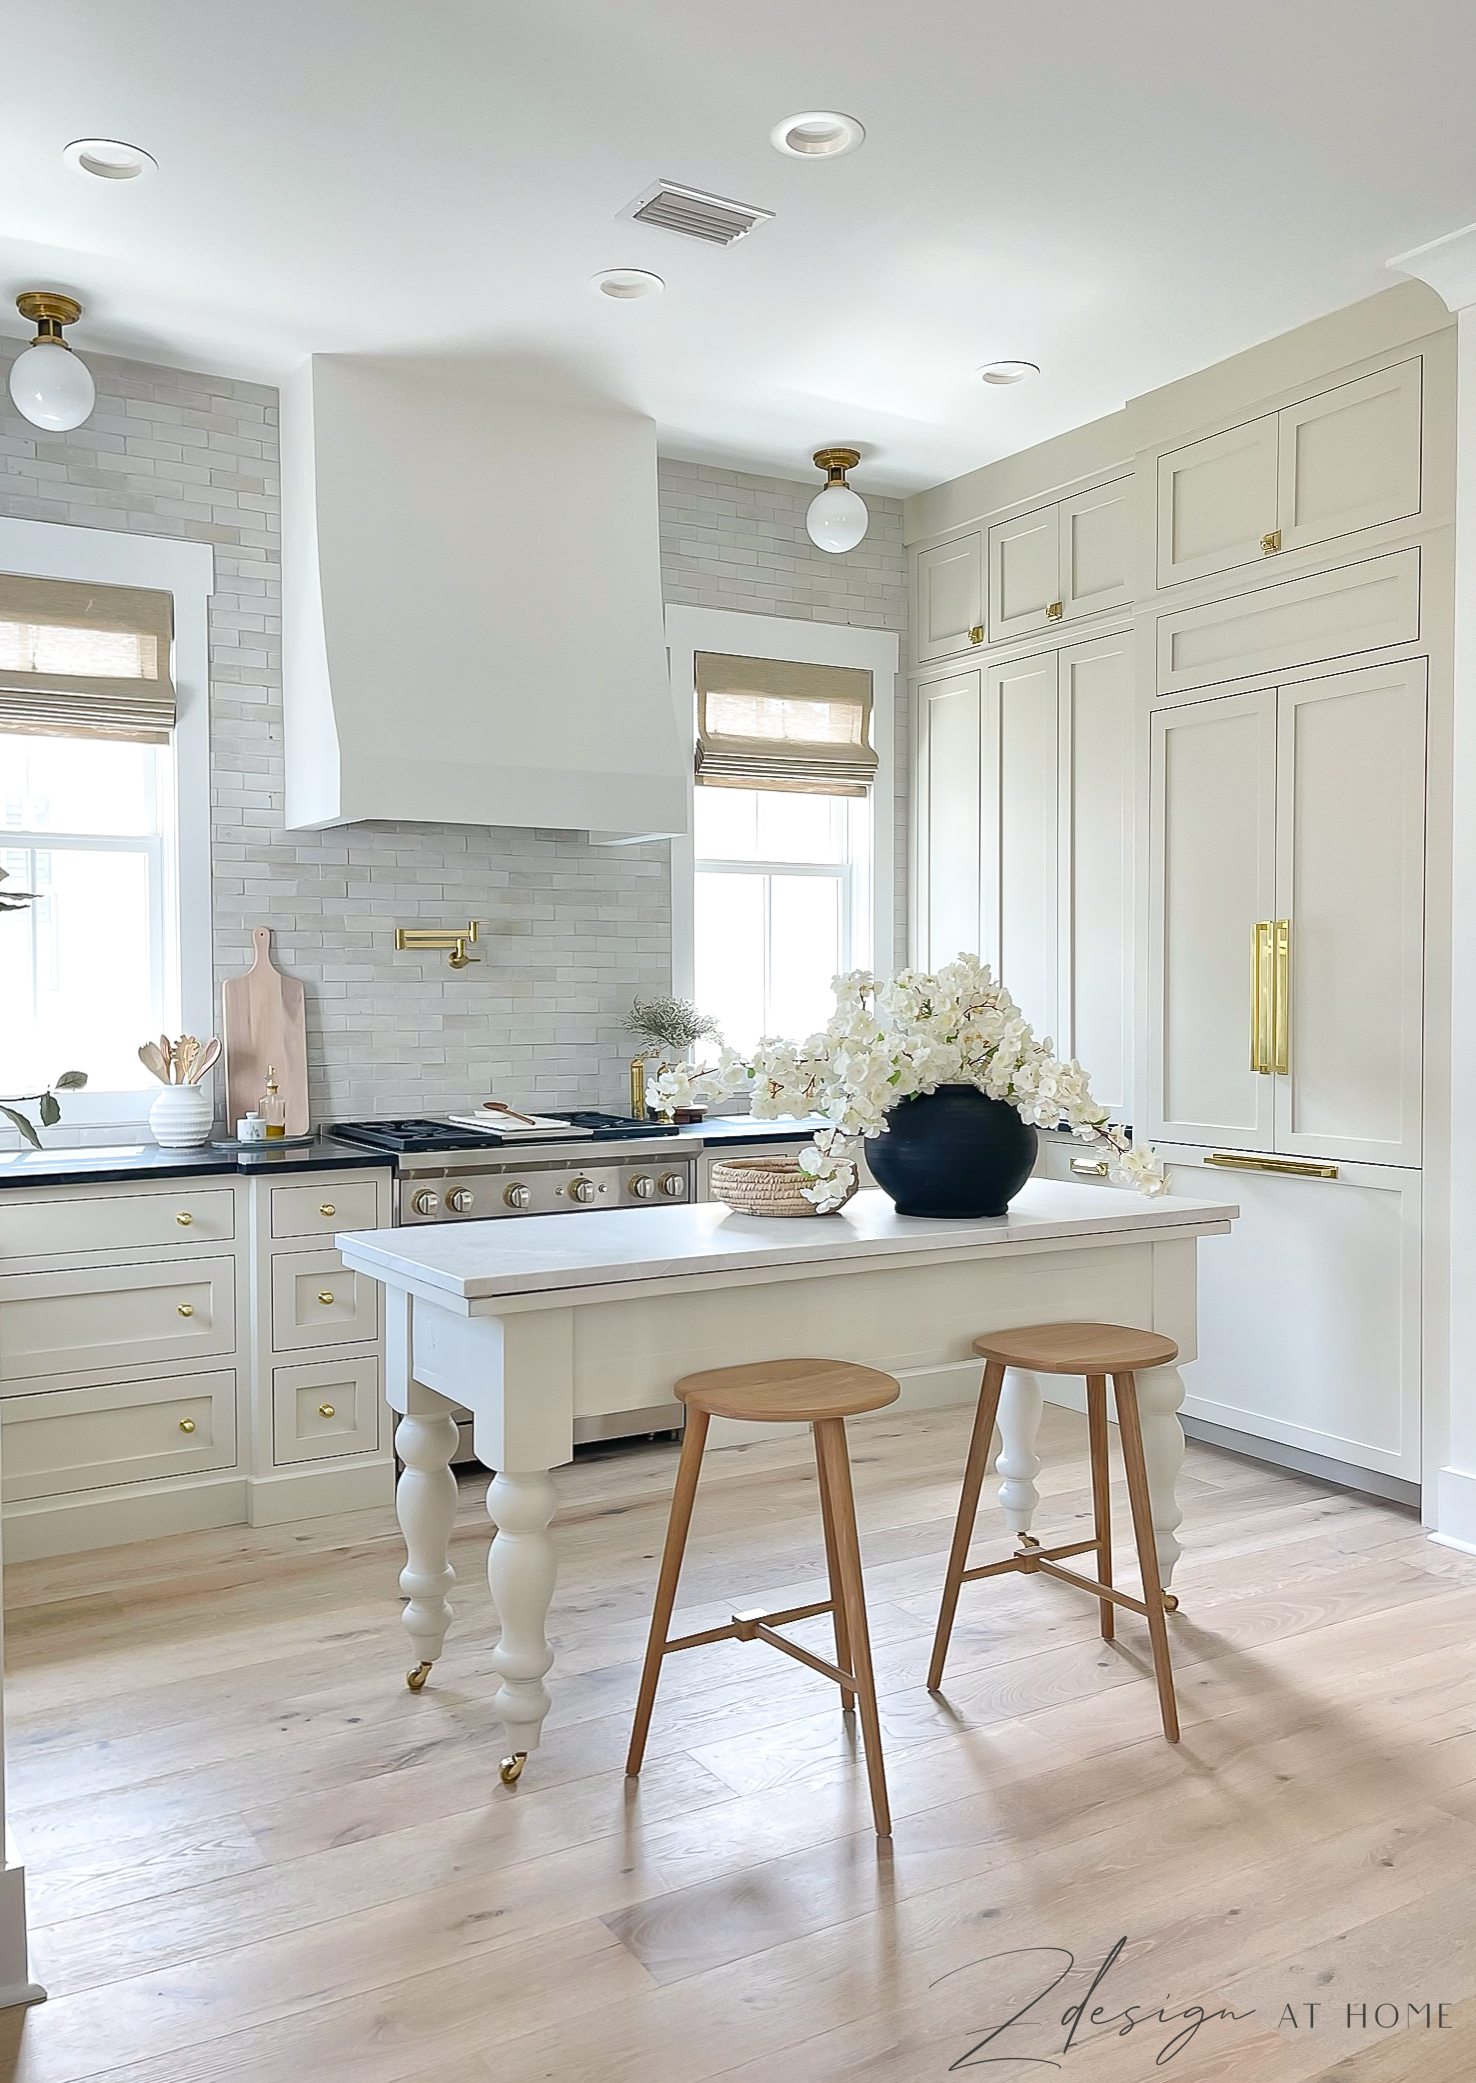
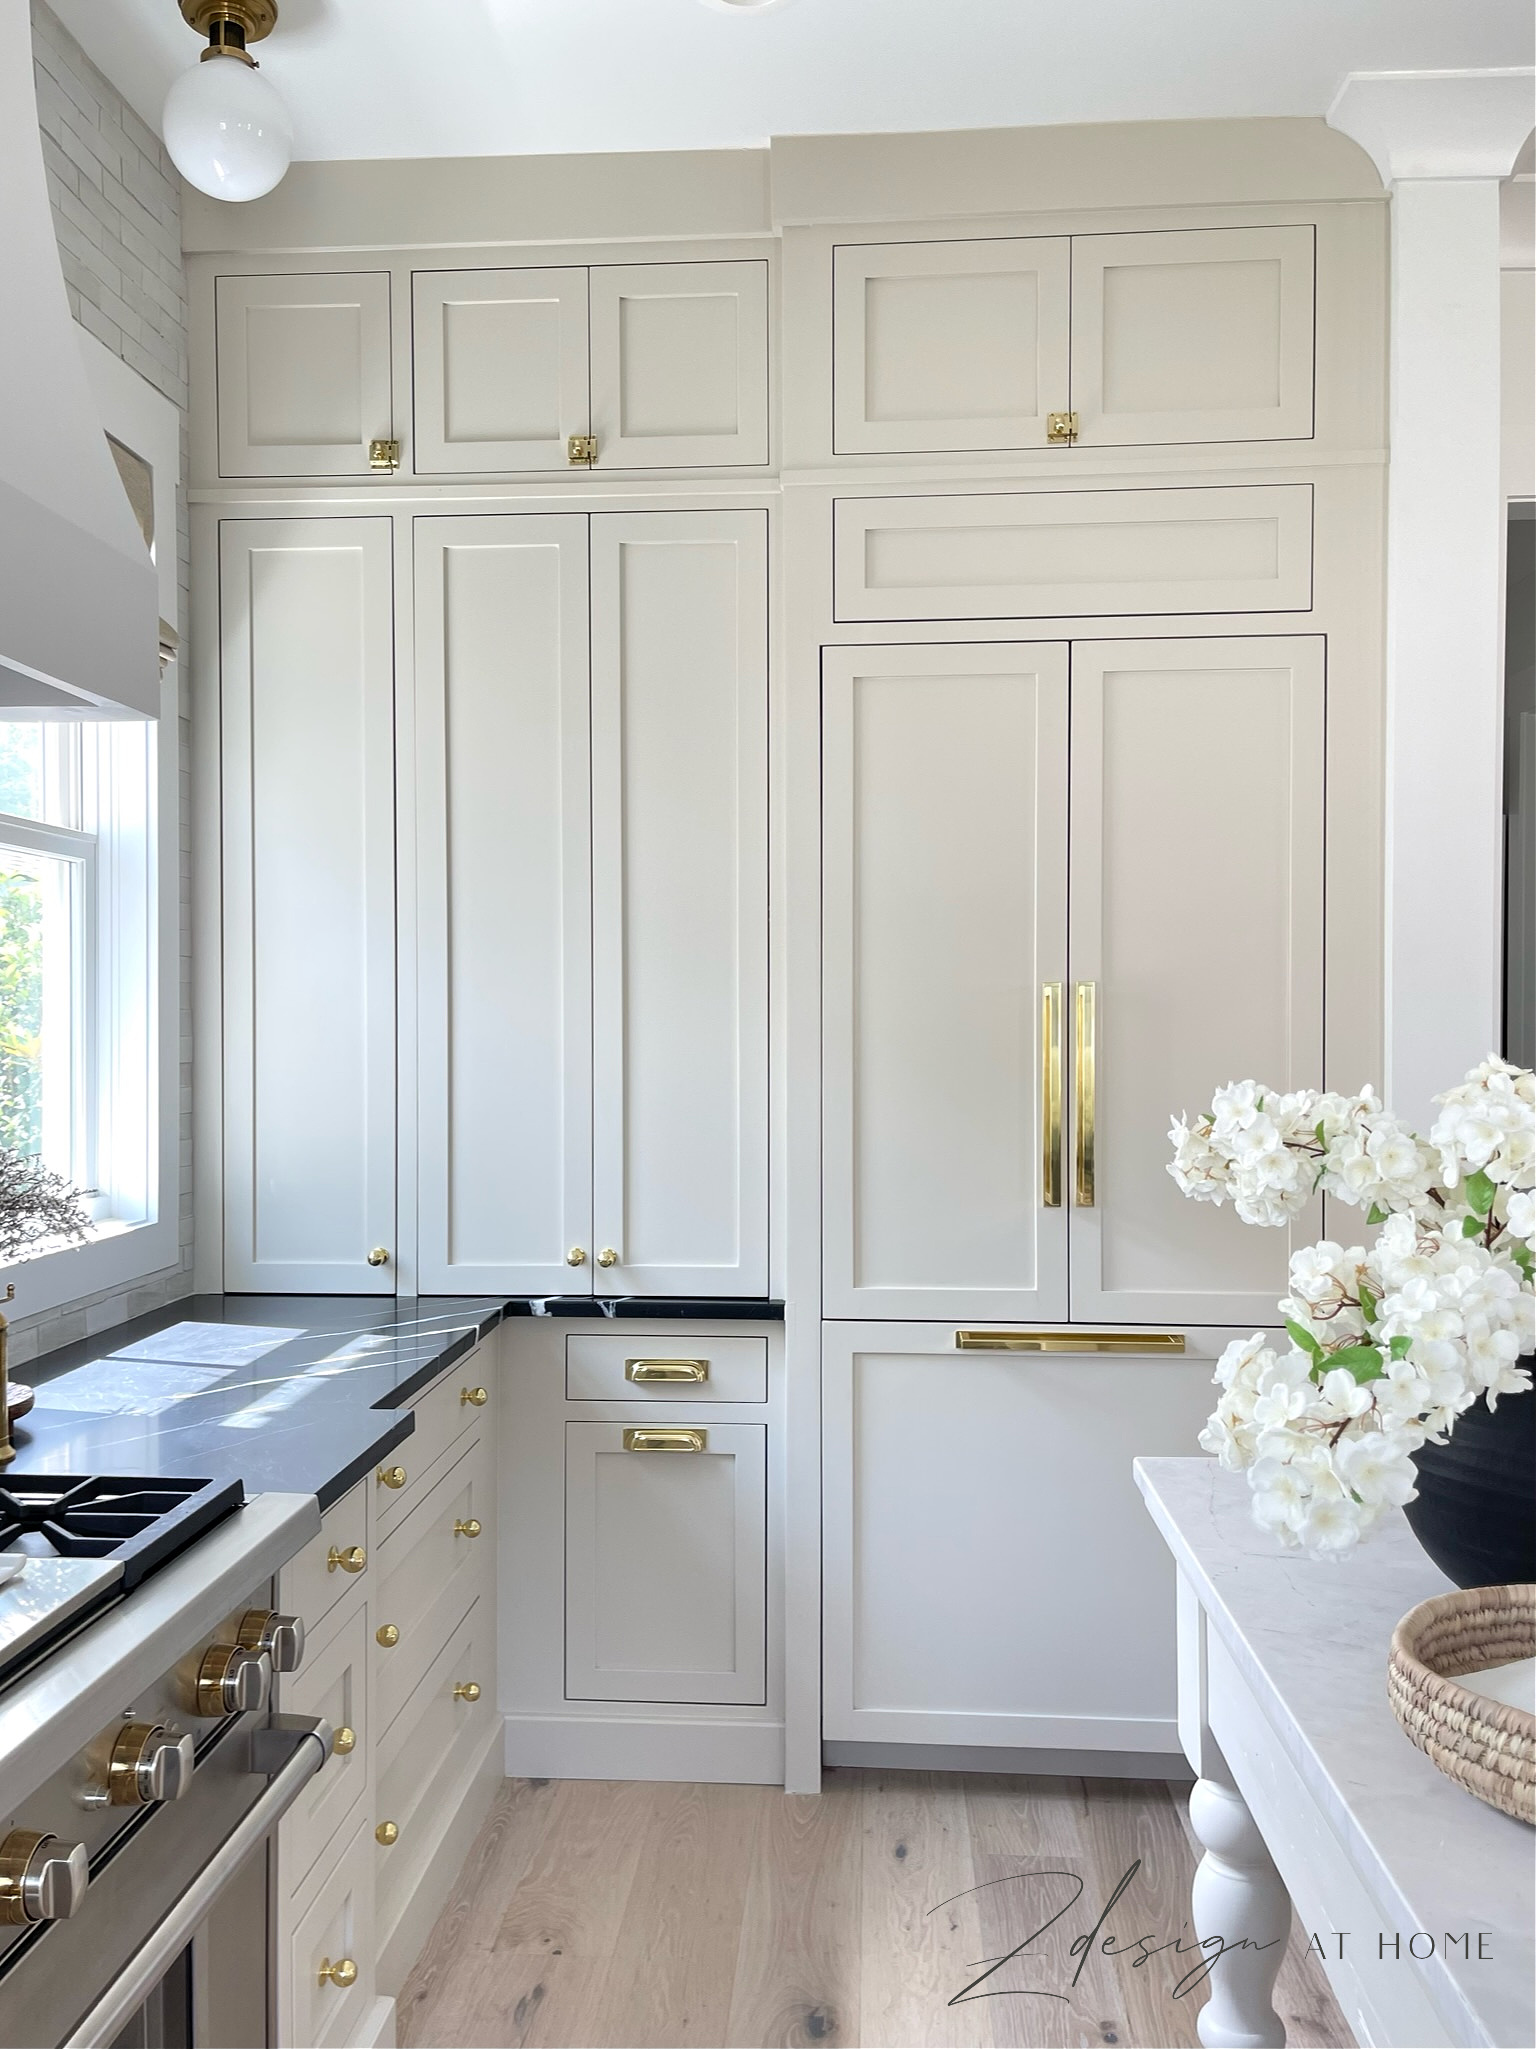
Cottage Kitchen Cabinet Paint Color & panel Ready refrigerator
You may be wondering by now what cabinet color I used?! The kitchen was really very stark white. I mean everything was white except the perimeter countertops. Not saying that’s bad at all but this space gets a TON of sunlight so it felt very stark and washed out for me. So, after I decided on swapping out the perimeter countertops & range hood, I decided we needed to warm up the cabinet color. I knew I wanted a cream paint color and sampled many colors of cream (ordered samples through Samplize.com) and landed on Benjamin Moore Natural Cream. It is really a fabulous color and I couldn’t be more happy with it. I found a great company locally that sprays cabinets (if you are local to Fairhope and/or Baldwin County it’s Elek Designs) and Devan helped to guide me on finish, etc., but I knew I wanted a matte and/or low luster finish and she was able to provide that for me. We are about 4 mo. into living with them and couldn’t be happier! Just for reference, to me Natural Cream has a subtle, warm gray undertone vs. a yellow undertone which I like but just know they definitely come off as cream and not gray! P.S. Our microwave lives behind the cabinets to the left of the fridge just in case you were wondering:).
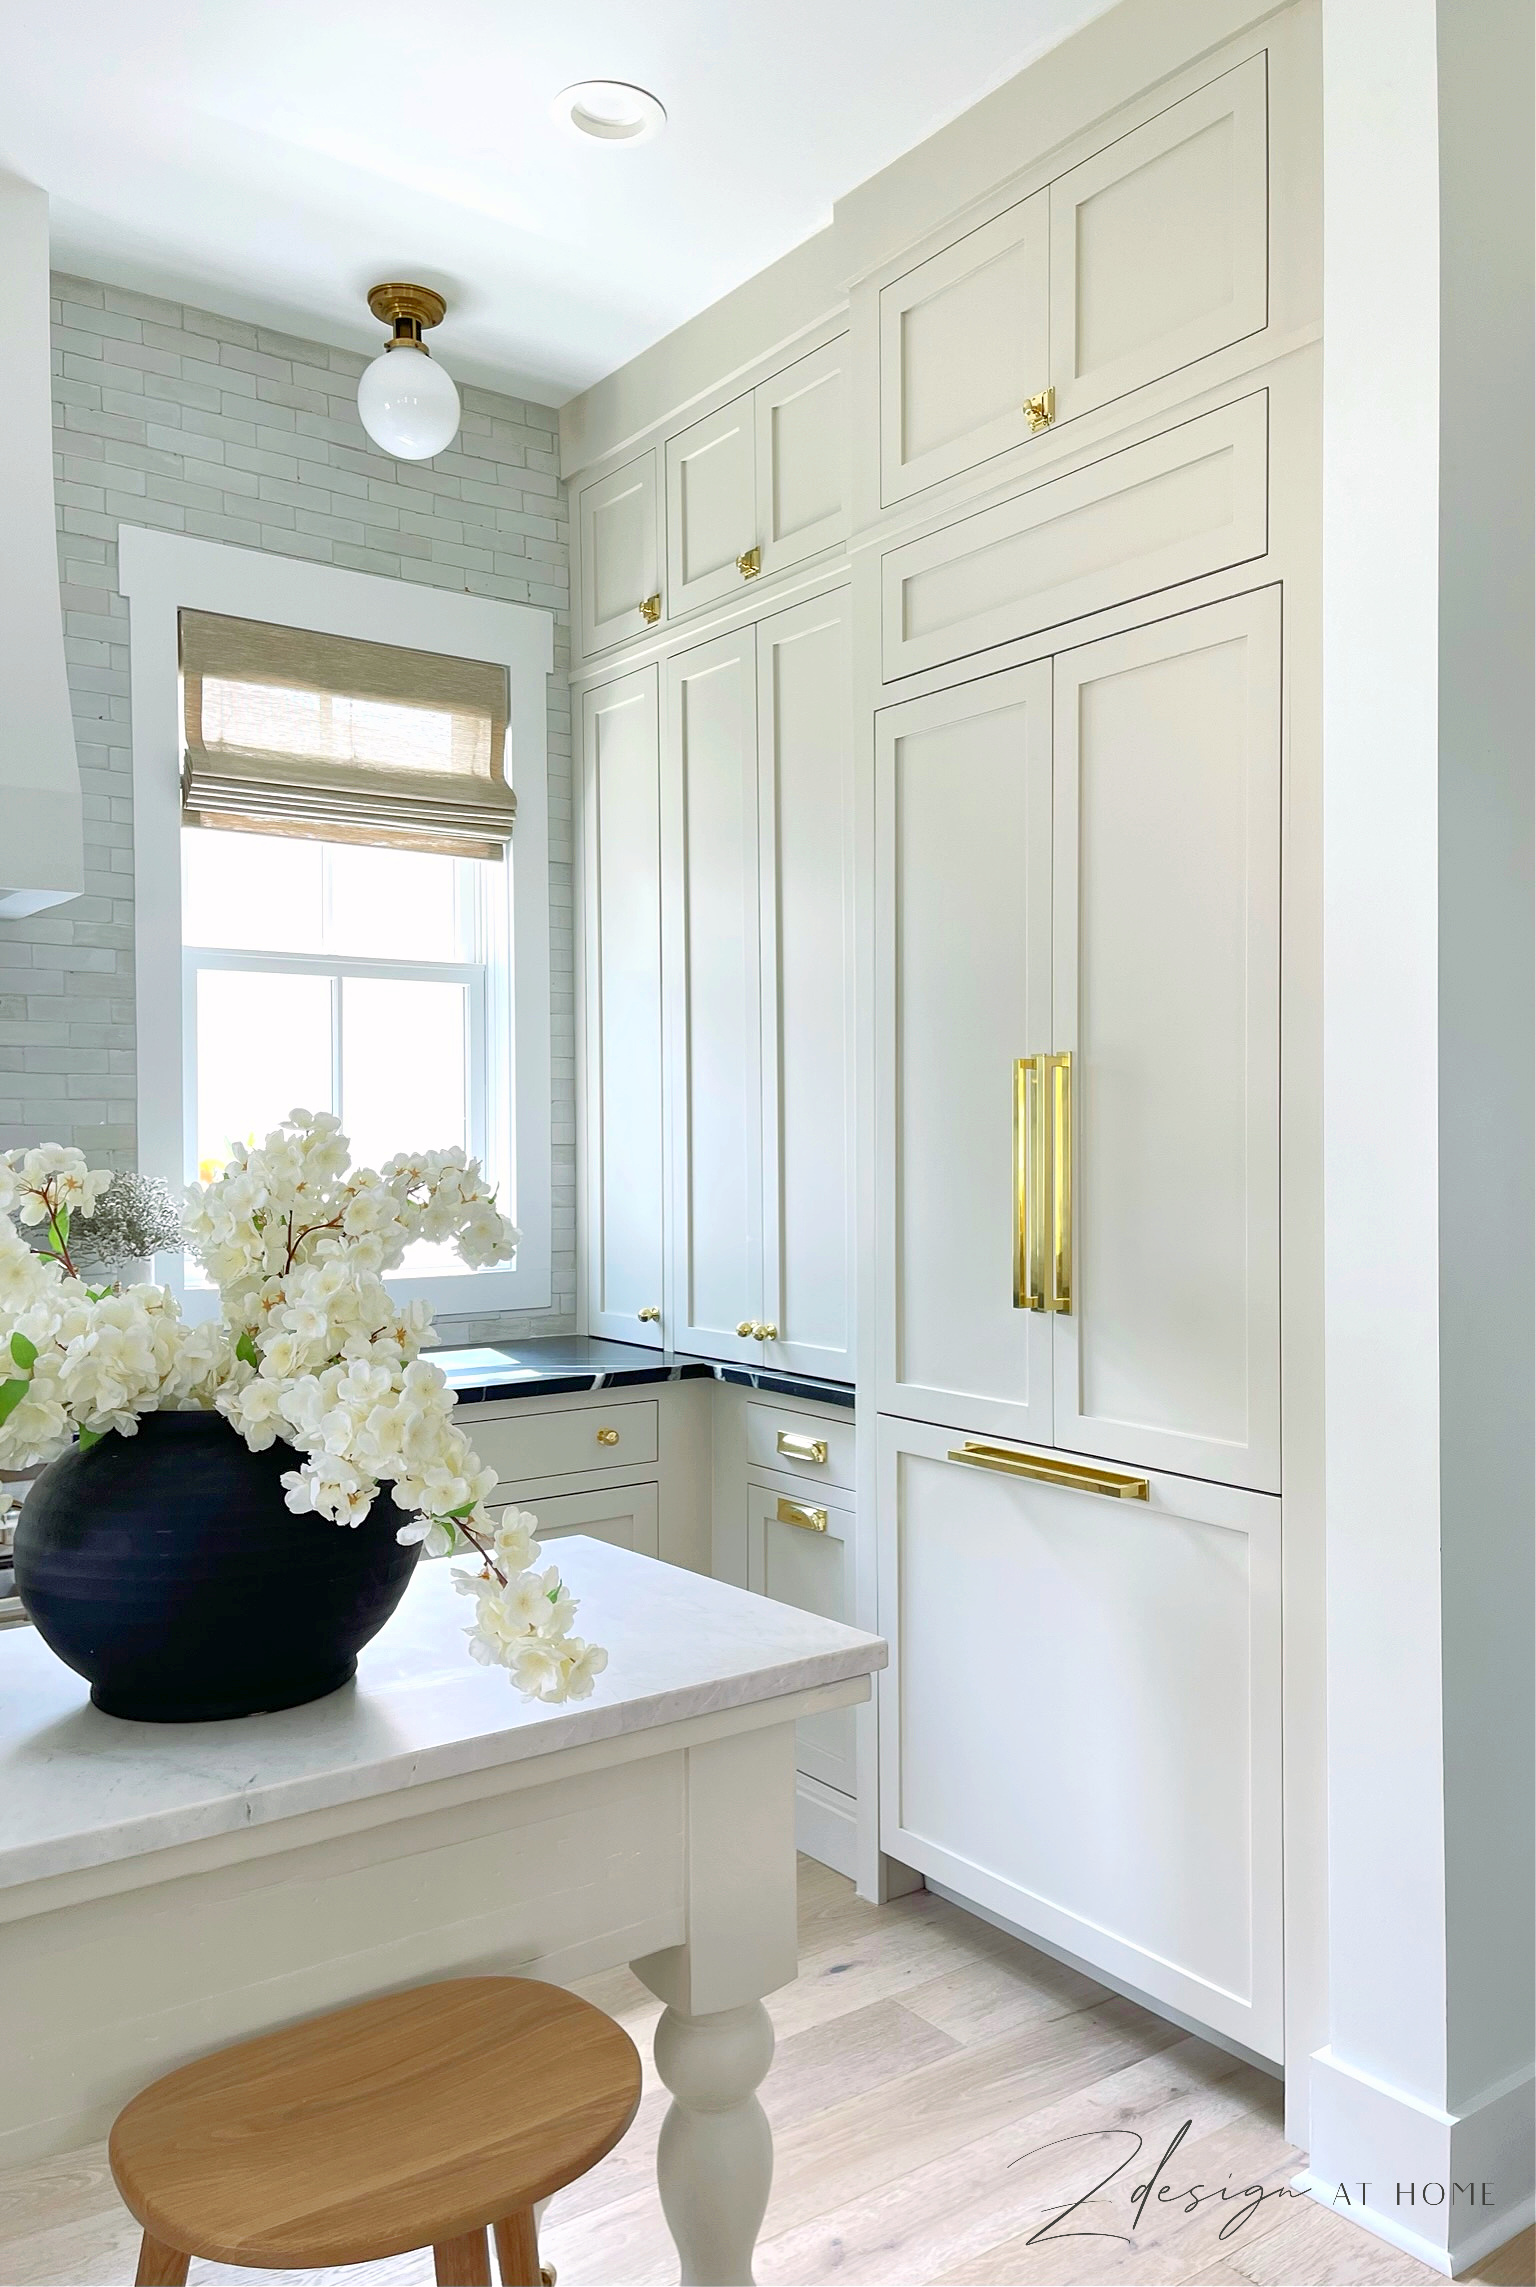
You would never know it but over here we ended up having to rip out most of the cabinets and redo them because we went from a stand alone to a panel ready refrigerator plus, the countertop had to come out and we couldn’t get it out without removing the cabinet above it. Additionally, when they tried to remove the cabinet above it just wouldn’t move so it got destroyed in the process unfortunately. Going from a stand alone to a panel ready refrigerator was the best thing we did in this kitchen renovation (same with the dishwasher). It really opened up the kitchen (because the stand alone was deeper) and created a much more custom, more functional situation on this side of the kitchen. We chose to go with the same brand fridge, Dacor, we had in our Houston home because it has an integrated hinge which means the hinge doesn’t show like it does in a lot of panel ready models. Again, it makes for a very clean, custom look that I’m super happy with.
One big design delima I had over here was that I didn’t want to come across the top of my beautiful new cream cabinets with the white crown molding that was there before (remember the cabinets were white previously so it worked before). I didn’t think it would look right so, it was a big risk I think but we came back over the top of the cabinets with a simple 1 x 6.5″ board to trim out the top of the cabinets. My cabinet/trim guy said the trick is to make it come 1/4″ to 1/2″ below the opposing crown to make a good marriage between two types of moldings that meet in the same space. If you have questions about that please feel free to comment below and I’ll answer anything I can.
The Zellige Tile Backsplash
Simultaneous with the cabinets I decided the backsplash needed to be warmed up as well and went with a thin Zellige tile in Snow White. I ordered several samples from different tile stores that sell authentic Moroccan Zellige tile and ended up going with the one from Riad Tile because it was the only thin Zellige available at the time (“thin” was necessary so that the tile didn’t protrude beyond the window trim which we didn’t want to have to remove and replace since we have 3 windows). Regarding the color just FYI…it’s more of a light gray to me vs. a white. This tile is very warm and charming and gives our kitchen so much character and is on the pricier end but it’s been sooo worth the splurge – we absolutely love it! For the record, of all the Zellige tile samples I ordered from different places, they are all mostly identical to one another in color, style, texture and price. For me the only real difference is that Riad had a thinner one available at 1/2″ vs. 7/8″ thickness but I did have a wonderful buying experience with them.

The Island
Moving on to the opposite side of the kitchen, after we discuss the island. I feel like the island is a piece of furniture (maybe a console table?) the previous owner purchased and then added marble to the top. It’s really not my style but it does feel very cottage like and I do really love it now! I also feel like at some point throughout the renovation the kitchen took on an English inspired cottage look (totally not intended) and when you couple that with the style of the island it really just made me fall in love with this space. The island was a super light gray color previously so we just painted it the BM Natural Cream along with the cabinets.
I also really like the barstools I chose a lot. They work for the space because the top has a flat side that snugs up against the side of the island since it’s not actual bar or counter height. The barstools are very well made and are actually a little lighter in color than they appear in my photos I think.
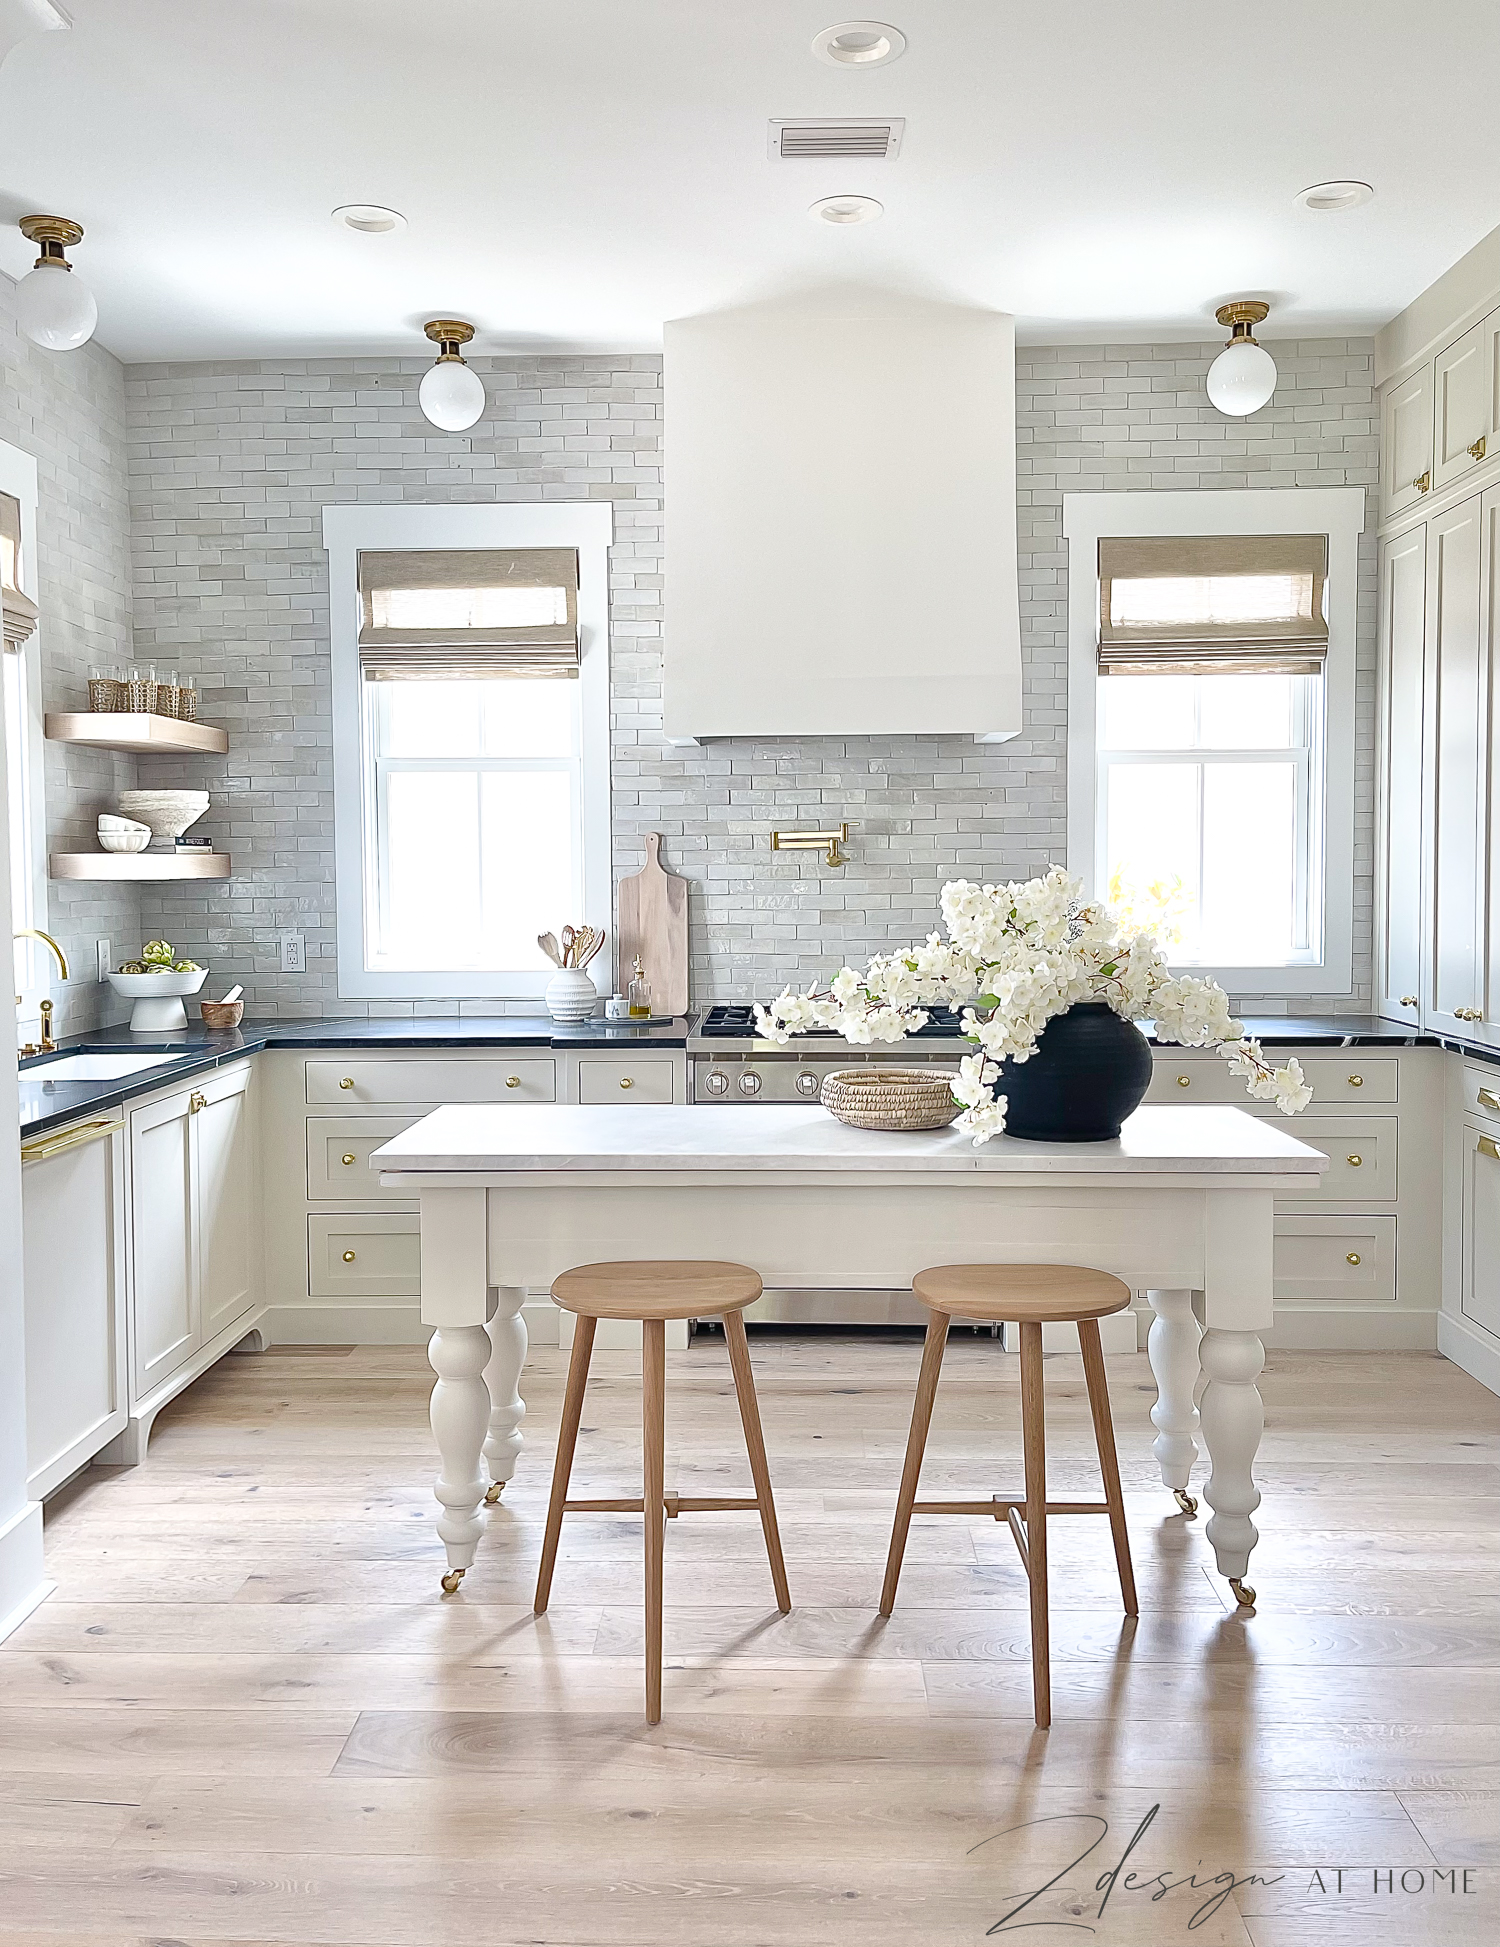
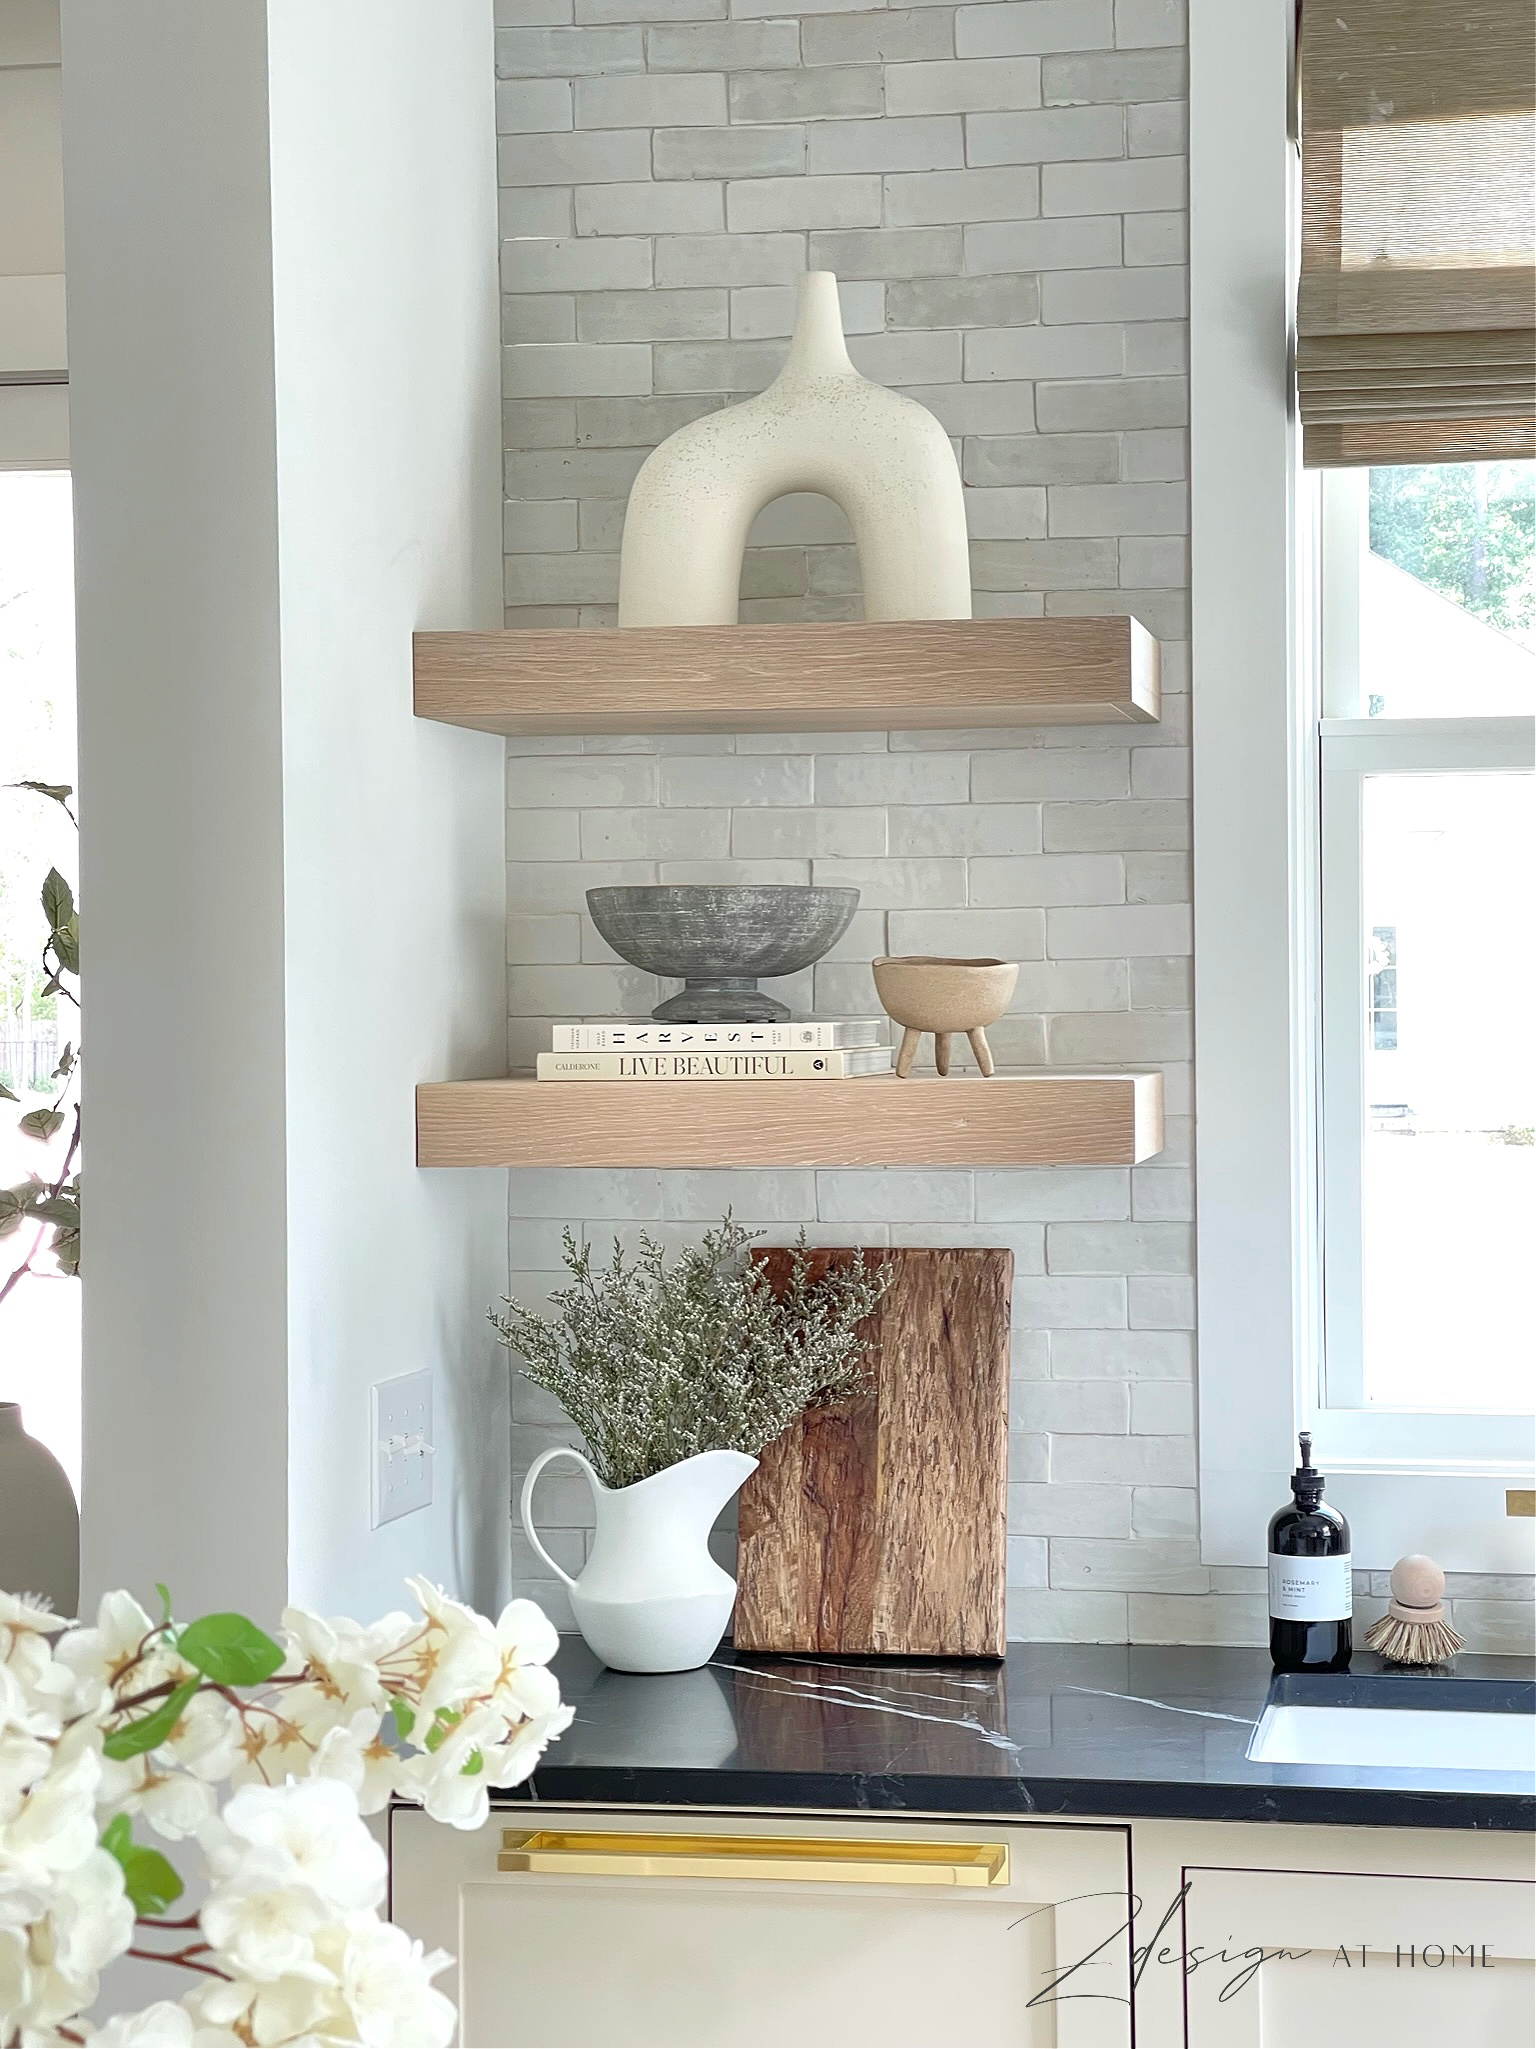
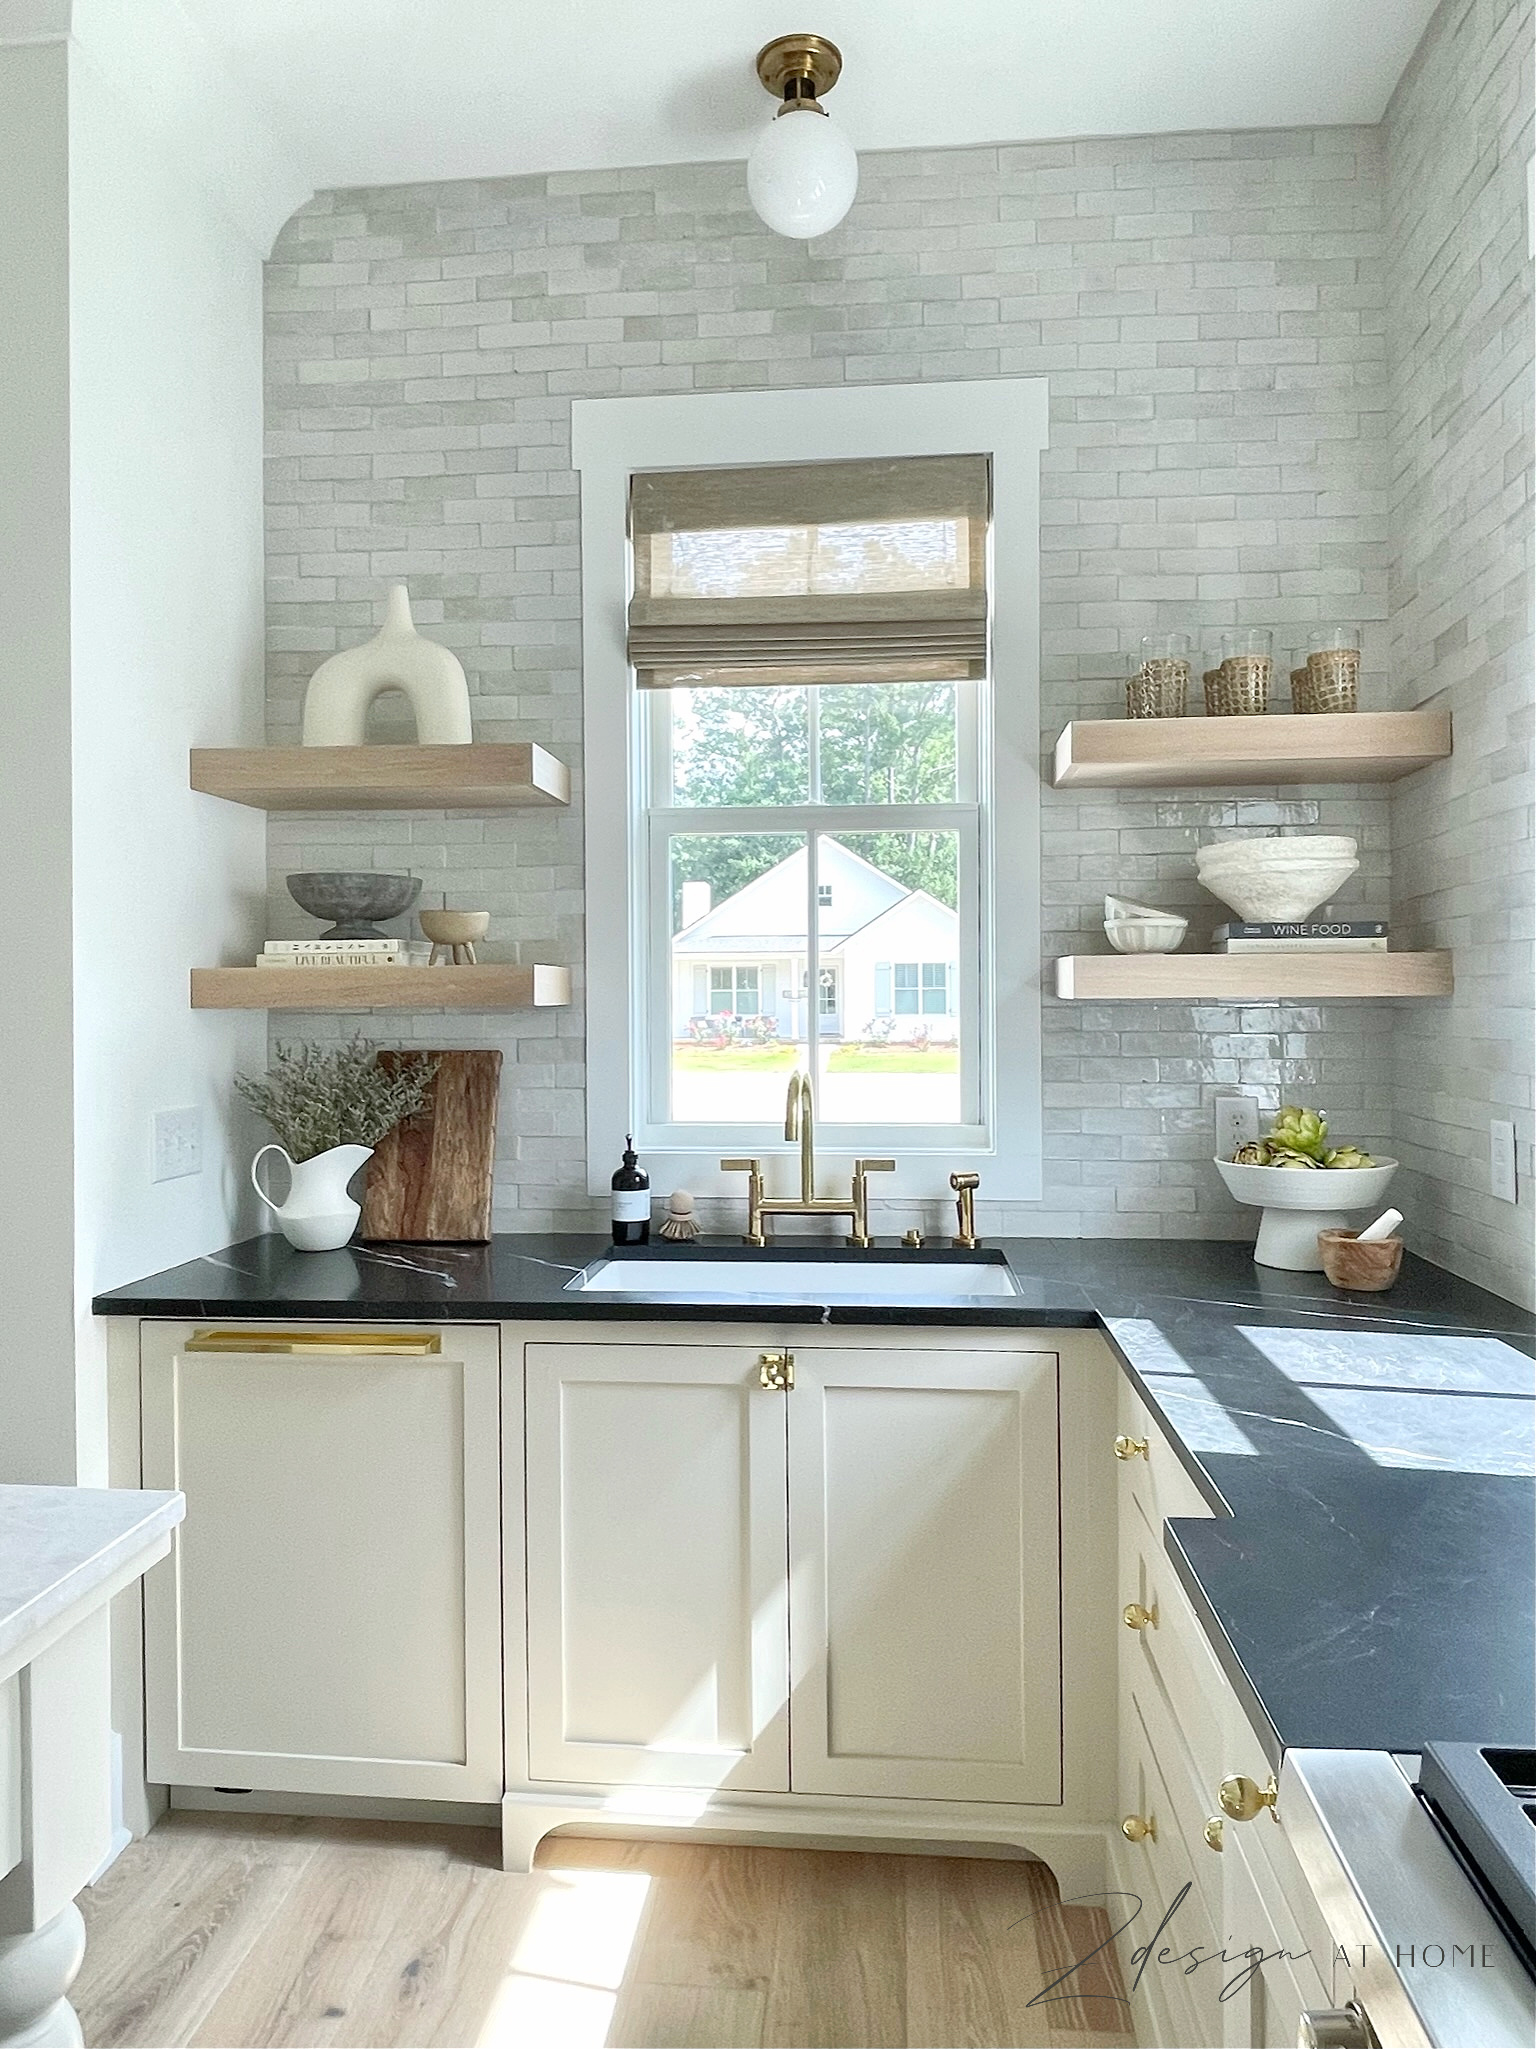
Dishwasher, Sink, Lighting & White Oak Shelves
The main change we made over on the sink side was the panel ready dishwasher. This change made a huge difference and really streamlined the look to a more designer custom look. We also replaced the shelves for a custom white oak shelf (stained in a Milesi stain, color is Sand) and changed the sink to this Fireclay Under Cabinet Kitchen Sink. The plumbing fixtures were also swapped out completely for Kallista fixtures in unlacquered brass. There was no cabinet under the sink and just a curtain to cover the hole (see before photo) which wasn’t my style so we added a new cabinet under the sink. We also changed out the existing hanging pendants to these flush mount globe lights – I really love them and also put them in our laundry room and hallway upstairs in a larger size.
I also used this modern farmhouse sink in our two rental homes and LOVE this it! It has no divider and is about 32″ wide. One thing I want to mention while we are here is that if you are renovating or building I would highly recommend not doing the faux drawer face under the sink (unless you have enough space between your sink and drawer face to install a tip out tray). If you’re not doing an apron front sink just take your cabinet doors all the way up. It’s a cleaner, more custom look and you won’t have to bend over so far to retrieve what’s under your sink.
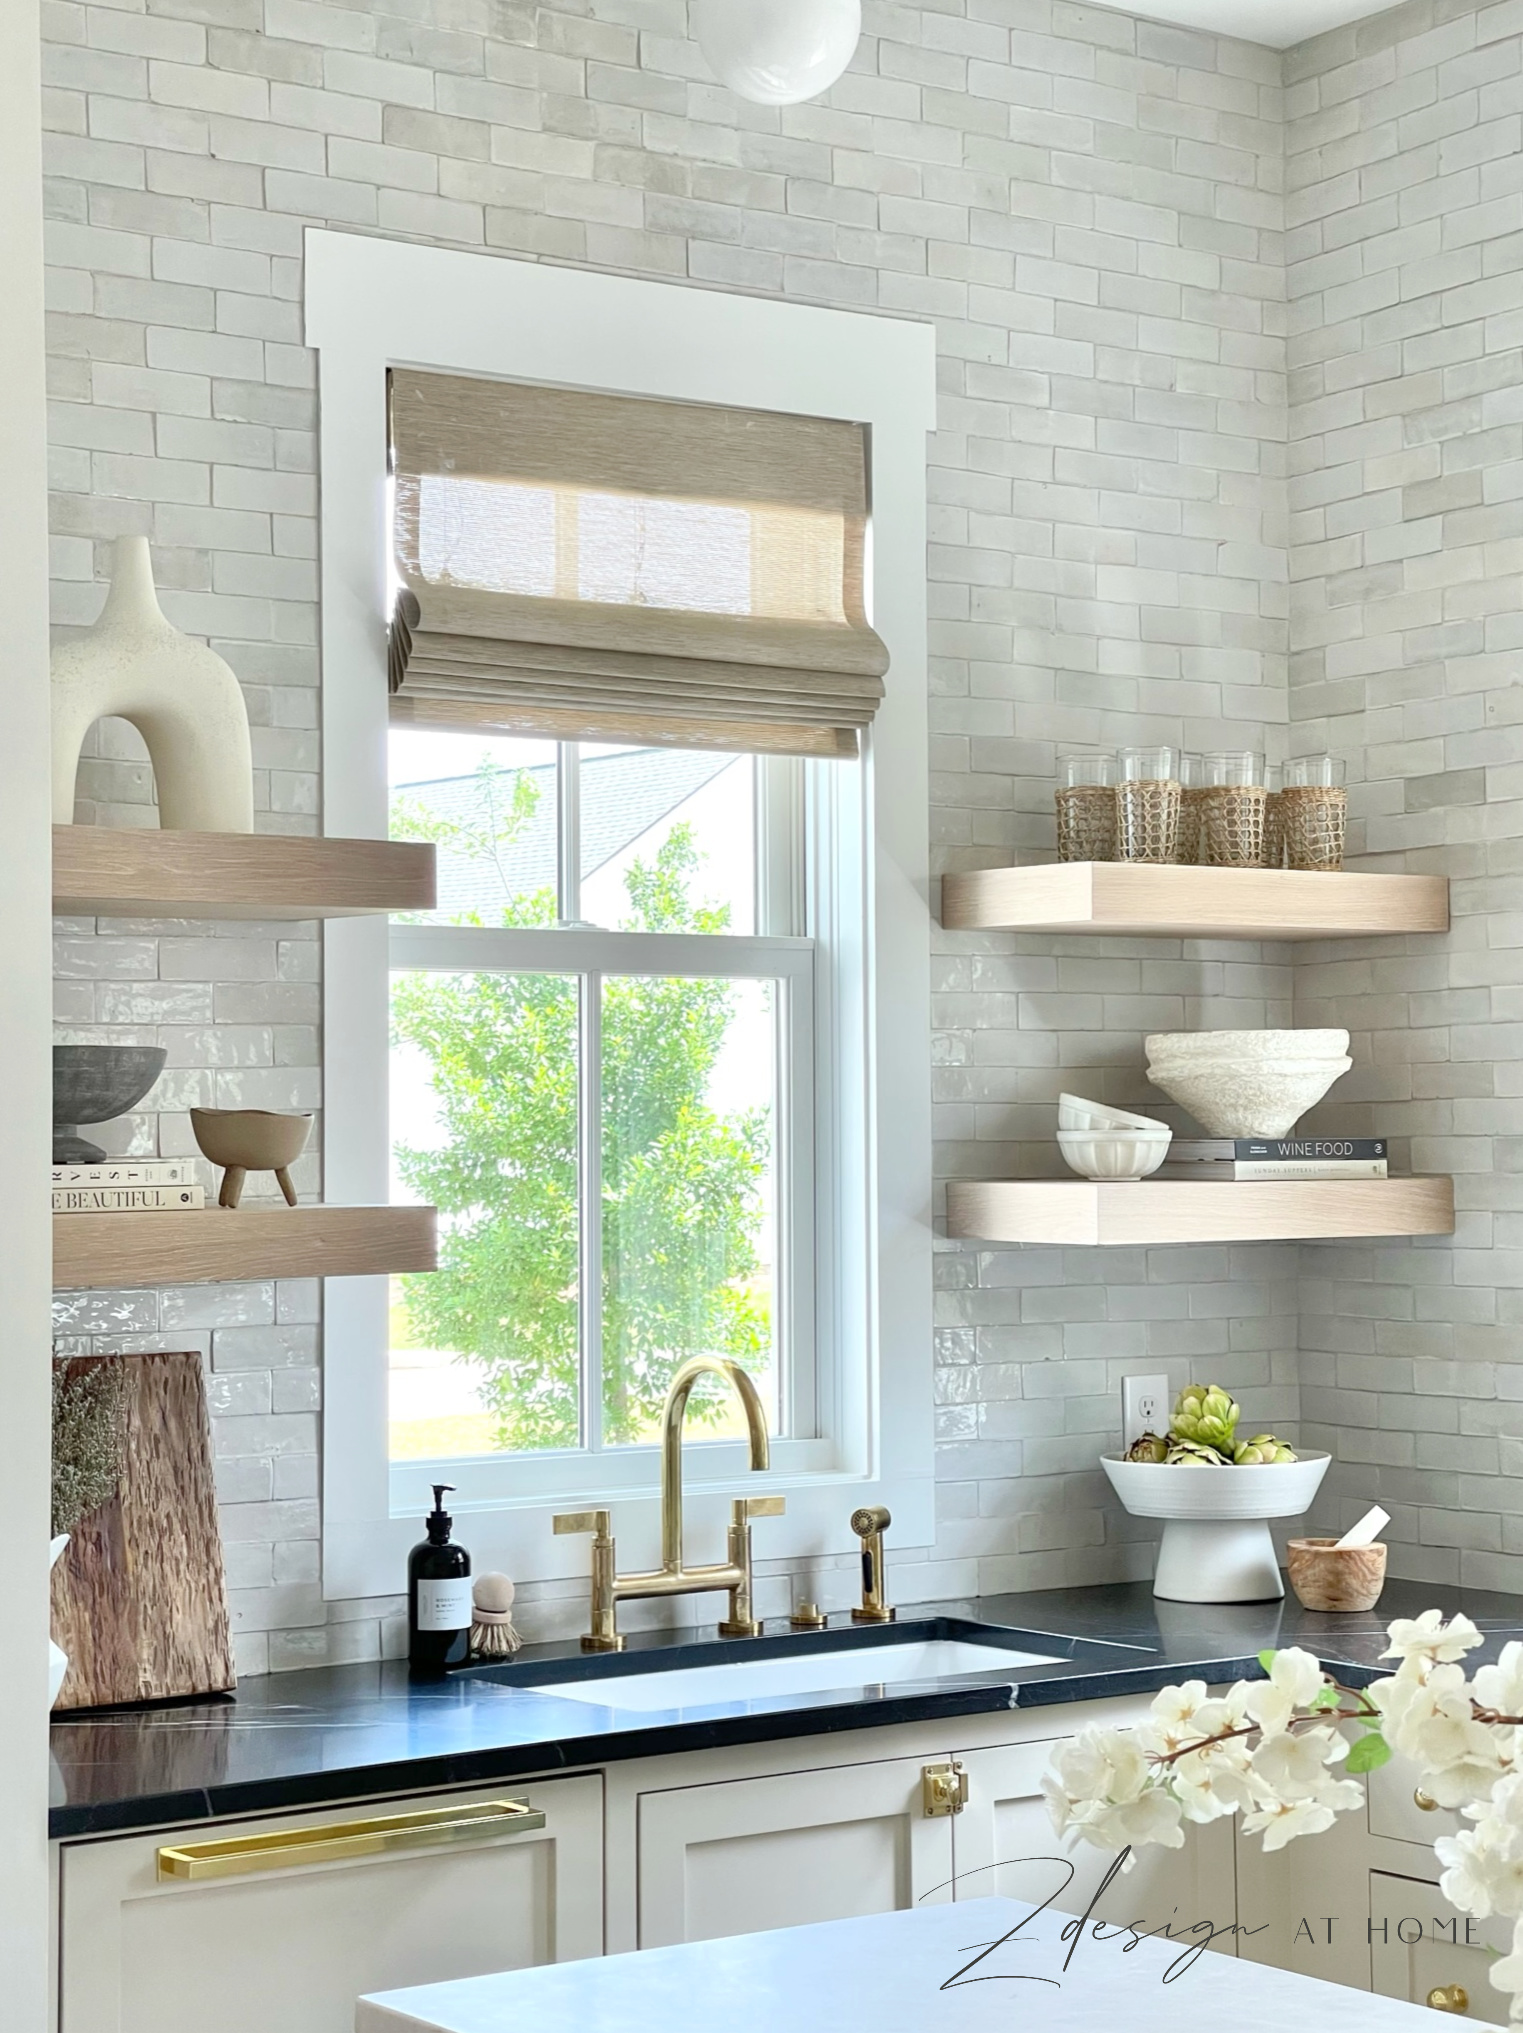
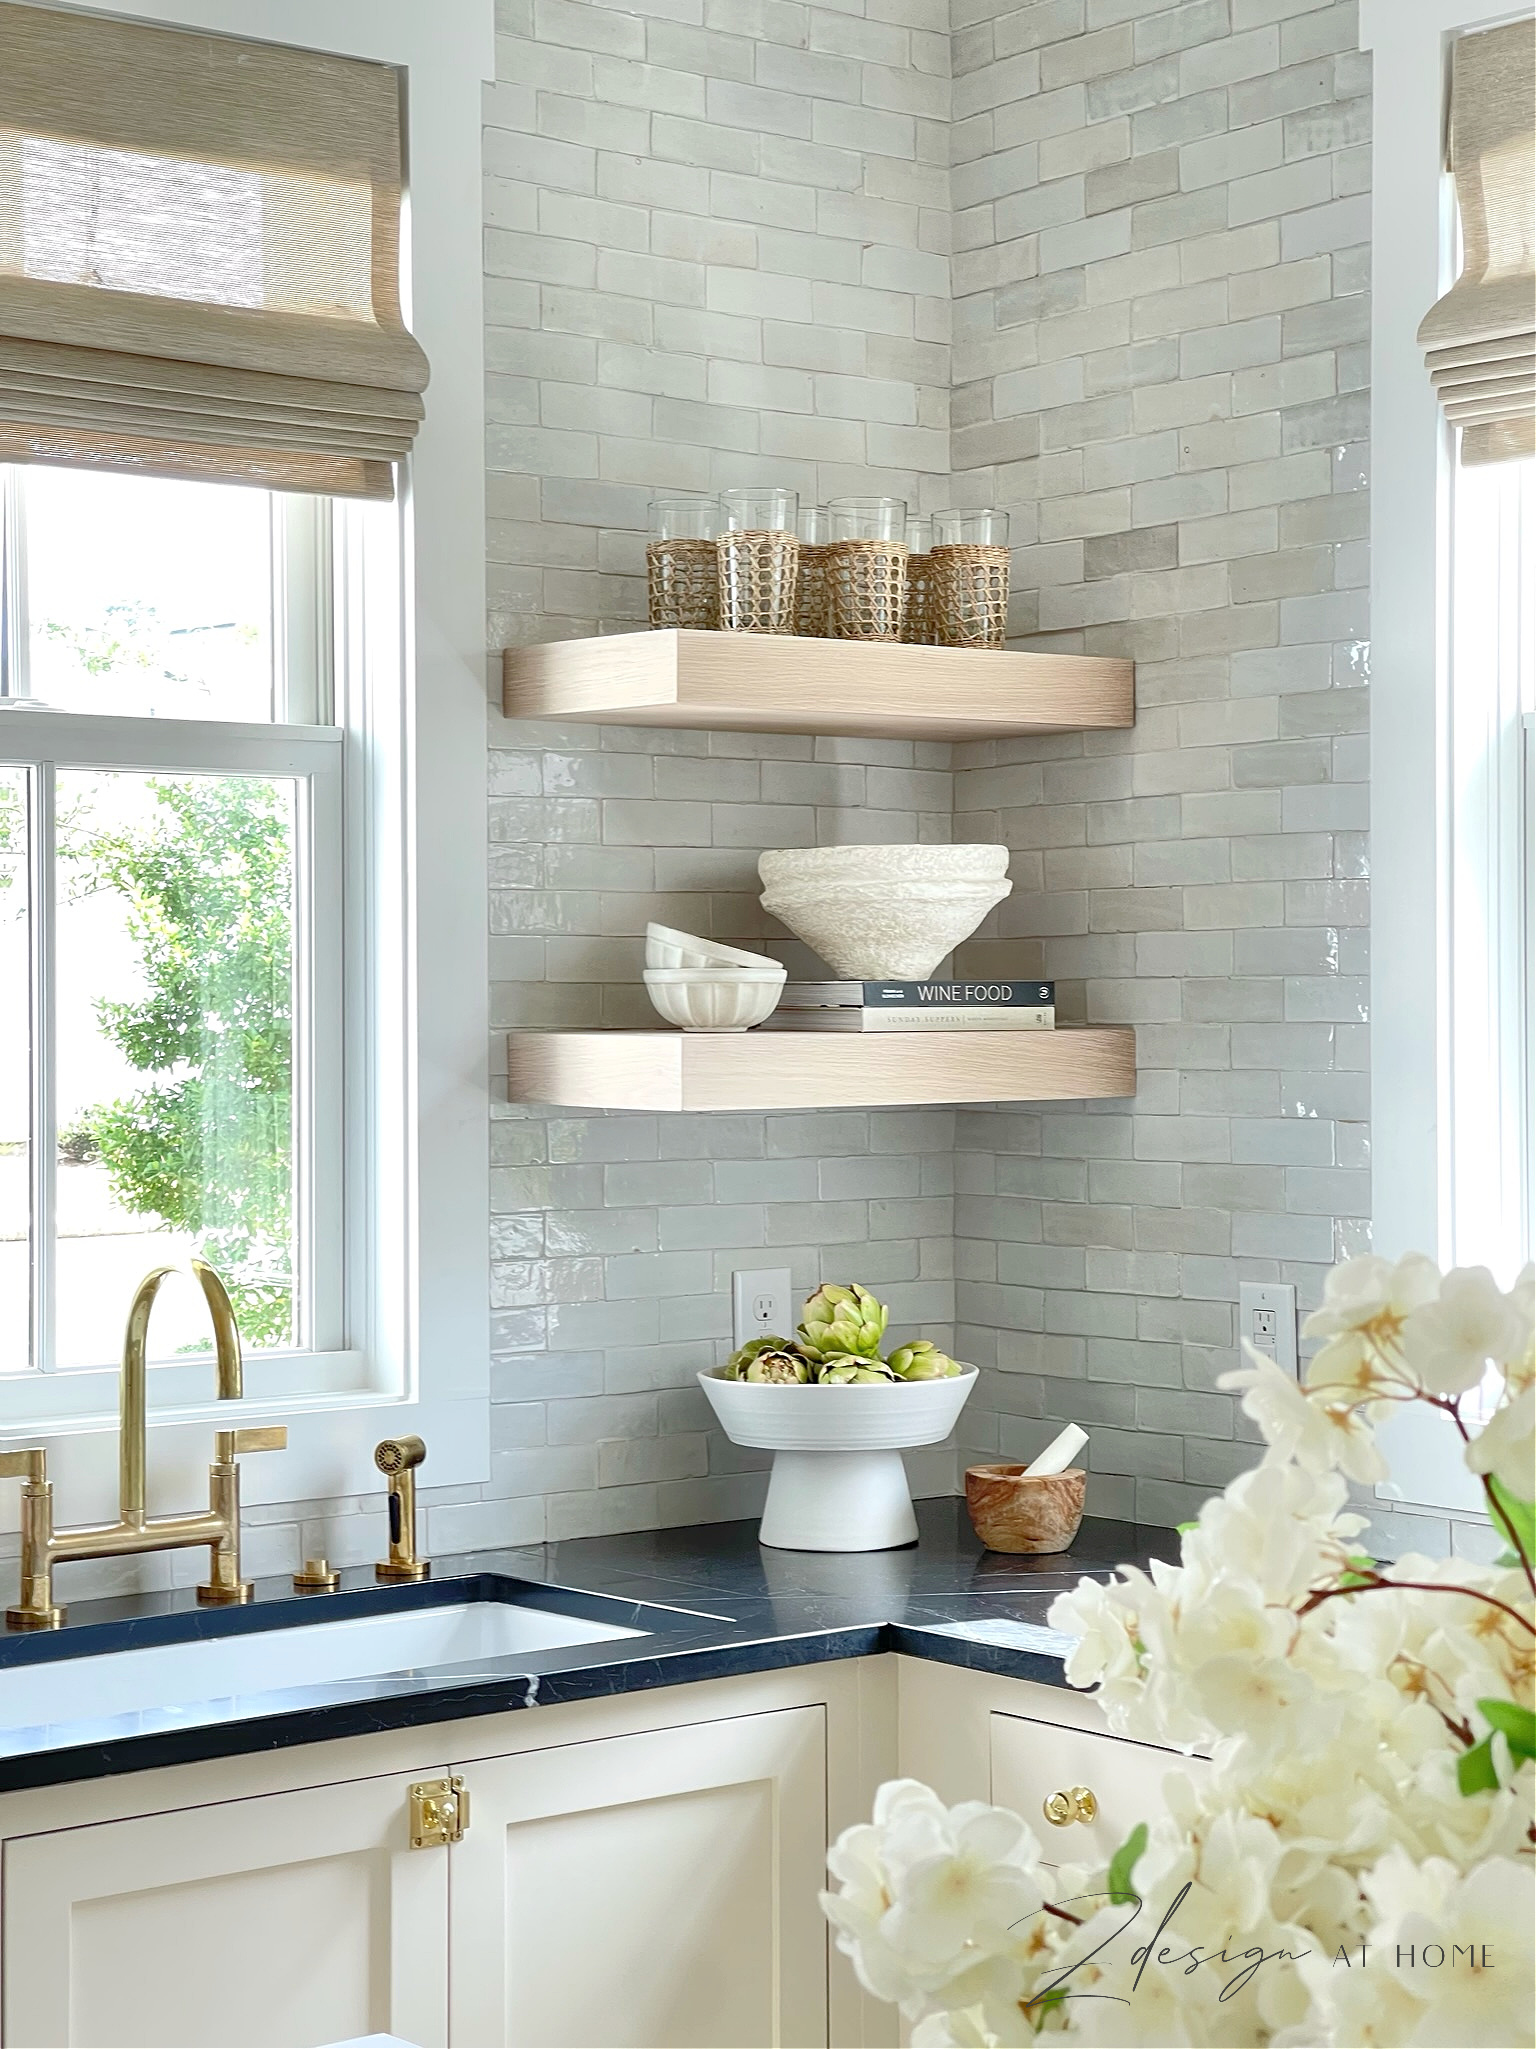
the Black Marble!
You can see our honed black marble countertops here even better as the sun hits them. Although I’m not in love with the few places that have some heavy white veining overall I just love them. Of course you have the typical issues you always get with marble but if you go into it knowing there will be etching and water stains over time you are golden. The patina they get over time tells a story and adds character in my opinion and should be celebrated vs. feared:).
The English Inspired Toe Kick
One last thing I haven’t covered yet is the toe kick, which also ended up being a major design dilemma. We ended up having to do an English style toe kick because after the floors were replaced there was a gap between the floor and the cabinet. I didn’t like the previous toe kick (plus it showed the gap) so in order to cover the gap we had to come back in with a solid toe kick which I absolutely love the look of! I thought I would be kicking it all the time and ruin them quickly but that hasn’t been the case at all. I was also worried it would be weird that under the appliances and the sink we had to do something totally different but that ended up being fine too. Under the sink obviously we had to have an open toe kick but thankfully there was no gap since that cabinet was new so it all worked out just fine.
The Cabinet Hardware
One more last thing…I’m sure you noticed we also switched out the cabinet hardware. I went with Armac Martin in their lacquered brass finish which is different from what I did on the plumbing fixtures at the sink. I was afraid I wouldn’t be able to handle the changes in color with the unlacquered brass knobs and pulls although now I wish I had done the unlacquered instead because I feel like the appliance pulls are to much (too bright), but it’s fine and I’m not gonna fret over it. HERE is a link but the only finish currently available at this link is more of a pretty antique to burnished brass finish. See below the actual hardware I have plus another much more affordable option that I also have in my primary bath, laundry room & son’s bath (in black).
I hope you’ve enjoyed the The Cottage Kitchen Renovation Details and Reveal! Please let me know if you have any questions in the comments and thanks for stopping by. I’ll be back real soon with the reveal of the cottage primary bath so stay tuned!

the Cottage Kitchen Sources
Flooring: Brand is Sawgrass Hills, Color is Monterey, material is a European white oak hardwood
Paint Color on hood & walls: SW Extra White
White Oak Shelf Stain: by Milesi, color is Sand
Barstools | Similar Tile | Flush Mount Lights | Pot Filler | Large White Vase on Shelf | Caspia Dried Florals | Small White Vase | Large Cutting Board | Marble Salt Cellar | Brass Pepper Mill | Black Vase on Island | Faux Cherry Blossom | Basket on Bar | Pitcher Vase (similar) | Half Baked Harvest Book | Gray Pedestal Bowl | Taupe Footed Bowl | Live Beautiful Book | Cane Wrapped Glasses | Fluted Stoneware Bowls | Paper Mache Bowl (similar) | Wine Food Book | White Pedestal Bowl | Faux Artichokes | Olive Wood Mortar & Pestle Set | Hand Soap | Dish Brush | Similar Faucet & Sprayer | Cupboard Latch | Cabinet Ball Knob | Appliance Pull | Small Gray Marble Tray | Sink | Olive Oil Dispenser | Similar Window Shades

Love everything ! What about the floating shelves ? What color are they ?
Hi Jess, they are white oak and the stain is by Milesi in the color Sand. Thanks for stopping by!
Thanks ! I’m in the middle of redoing my kitchen now . I love your previous kitchen too ! Comments are closed on that blog but wondering if you can please share how wide is the hood and the shelves next to hood (in previous kitchen )?
Hi Jess, sorry for the delay! And sorry about the comments being closed, I’ll have to figure out what happened there and fix that. Since we are no longer in the house unfortunately I can’t just go measure for you but, the range was 42″ wide and the hood was a little wider than that. If you google it, you can find what the width of your range hood should be based on the width of your range but I want to say it should be at least 2″ wider on either side so about 4-5″ wider than your range. If I remember correctly the shelves were 26″ wide. Please let me know if you have any other questions whatsoever and please always feel free to email me at zdesignathome@gmail. Thanks!
Although I really liked the original kitchen, I can definitely see the improvements you made created a really beautiful kitchen! Glad you are back to blogging. Looking forward to seeing the rest of your cottage!
Hi Linda, thank you! Yes, after we bought the property we really began to fall in love with the lot and the neighborhood so are thinking we will be here until our son graduates from high school, maybe longer so we really wanted to make it our baby if you know what I mean! Thank you for stopping by!
You made a very pretty kitchen look even better….well done!! I wish I had known your opinion on quartz before adding it to my kitchen, it is such a disappointment. I should not have believed all the hype about the counter material of the moment 🙁 One can never go wrong with marble.
Hi Joan, Quartz is great! For me it was just a case of having had both and realizing that I love marble more, even with its imperfections. I’m sure your’s are beautiful and I wouldn’t worry about it one bit. Thank you so much for stopping by the blog!! xo
Oh my goodness what a treat to see how you refreshed your new kitchen cottage. So many beautiful details that you have added. I can gradually add some of the decorating ideas that you included. You are always so generous sharing all the details and where to purchase items, as well as educating why you made the choices that you did. I love your space, it’s absolutely gorgeous!!
Denise, thank you so much! You are so sweet and I appreciate you stopping by so much! My hope is always that most of my posts are helpful with enough details and information you can use in your own home. I look forward to seeing you again next time. xoxo
Glad you’re back. You worked your magic again! Looking forward to the rest of the cottage. You have such great taste.
Thank you so much, Tricia! I appreciate your support and words of encouragement more than you know! Look forward to seeing you next time!! 🙂
Did they use spacers when installing the backsplash? We’re thinking to use it for our bathroom and trying to decide between Zagora (similar tile that you linked) or the Zellige from Riad tile. Do you know the difference?
Hi Stephanie, I am not familiar with Zagora (although I’ll look it up!) but we did not use spacers for the most part. The tile is uneven so sometimes it’s necessary to keep the lines straight with this tile. And, our tile guy had never used this tile before and had some challenges but that was mainly due to the fact that the framing wasn’t completely straight (and we weren’t about to go back and fix all of that) so our install didn’t go perfectly (not his fault) but overall it’s pretty good. Based on the research I’ve done they don’t necessarily recommend spacers for this type tile and I believe a butt joint is preferred. I also believe Riad and Clé Tile both have best practices for installation on their website so I would probably check there. Thanks so much for stopping by and please always feel free to email me at ZDesignathome@gmail with any questions! xo
The kitchen looks amazing. Would you mind sharing info about the floors.
Hi Sharon, Thanks for asking! The floors are by Sawgrass Hills and the color is Monterey. They are a European white oak hardwood. They are gorgeous and we love them! Thanks for stopping by!! xo
Absolutely stunning my friend! You truly are such a talent – you’ve elevated this kitchen beyond! Every detail is spectacular! Congratulations xoxox
Tam, thank you so much my friend! And thank you for stopping by! Love ya! xoxo
Hi is your pot filler installed at the center of range ?
Hi Jess, the pot filler in our current home (this blog post) is centered over the range but in our previous home you mentioned before it was off center. I don’t really have a preference either way and both positions seem fine to me. Thanks!